A Seaside Shoot: Behind The Scenes w/ My Essential Kit
Seaside Shoot: Behind the Scenes with My Essential Kit
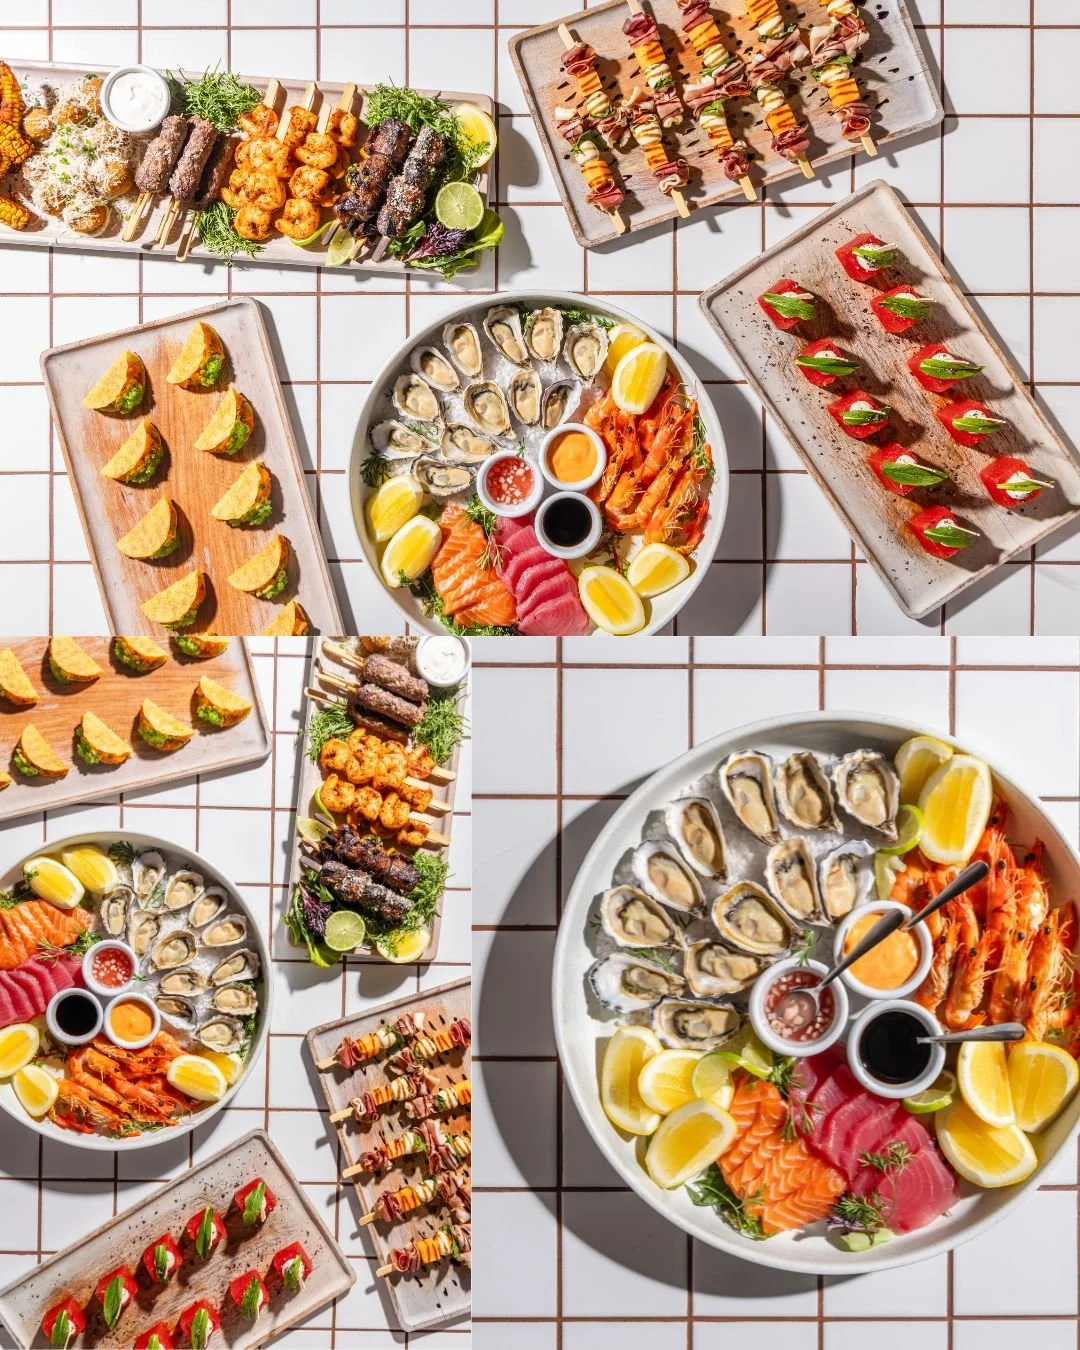
I recently had the pleasure of shooting some stunning food and lifestyle content at a beautiful seaside location, and I wanted to share a peek at the essential gear that made the magic happen! A location like this with its mix of natural light, vibrant interiors, and outdoor spaces requires a versatile, powerful, and portable kit. From capturing those perfect overhead table spreads to detailed close-ups, here’s a look at the tools that were indispensable for this project.
Mastering the Light: Profoto Power and Modifiers
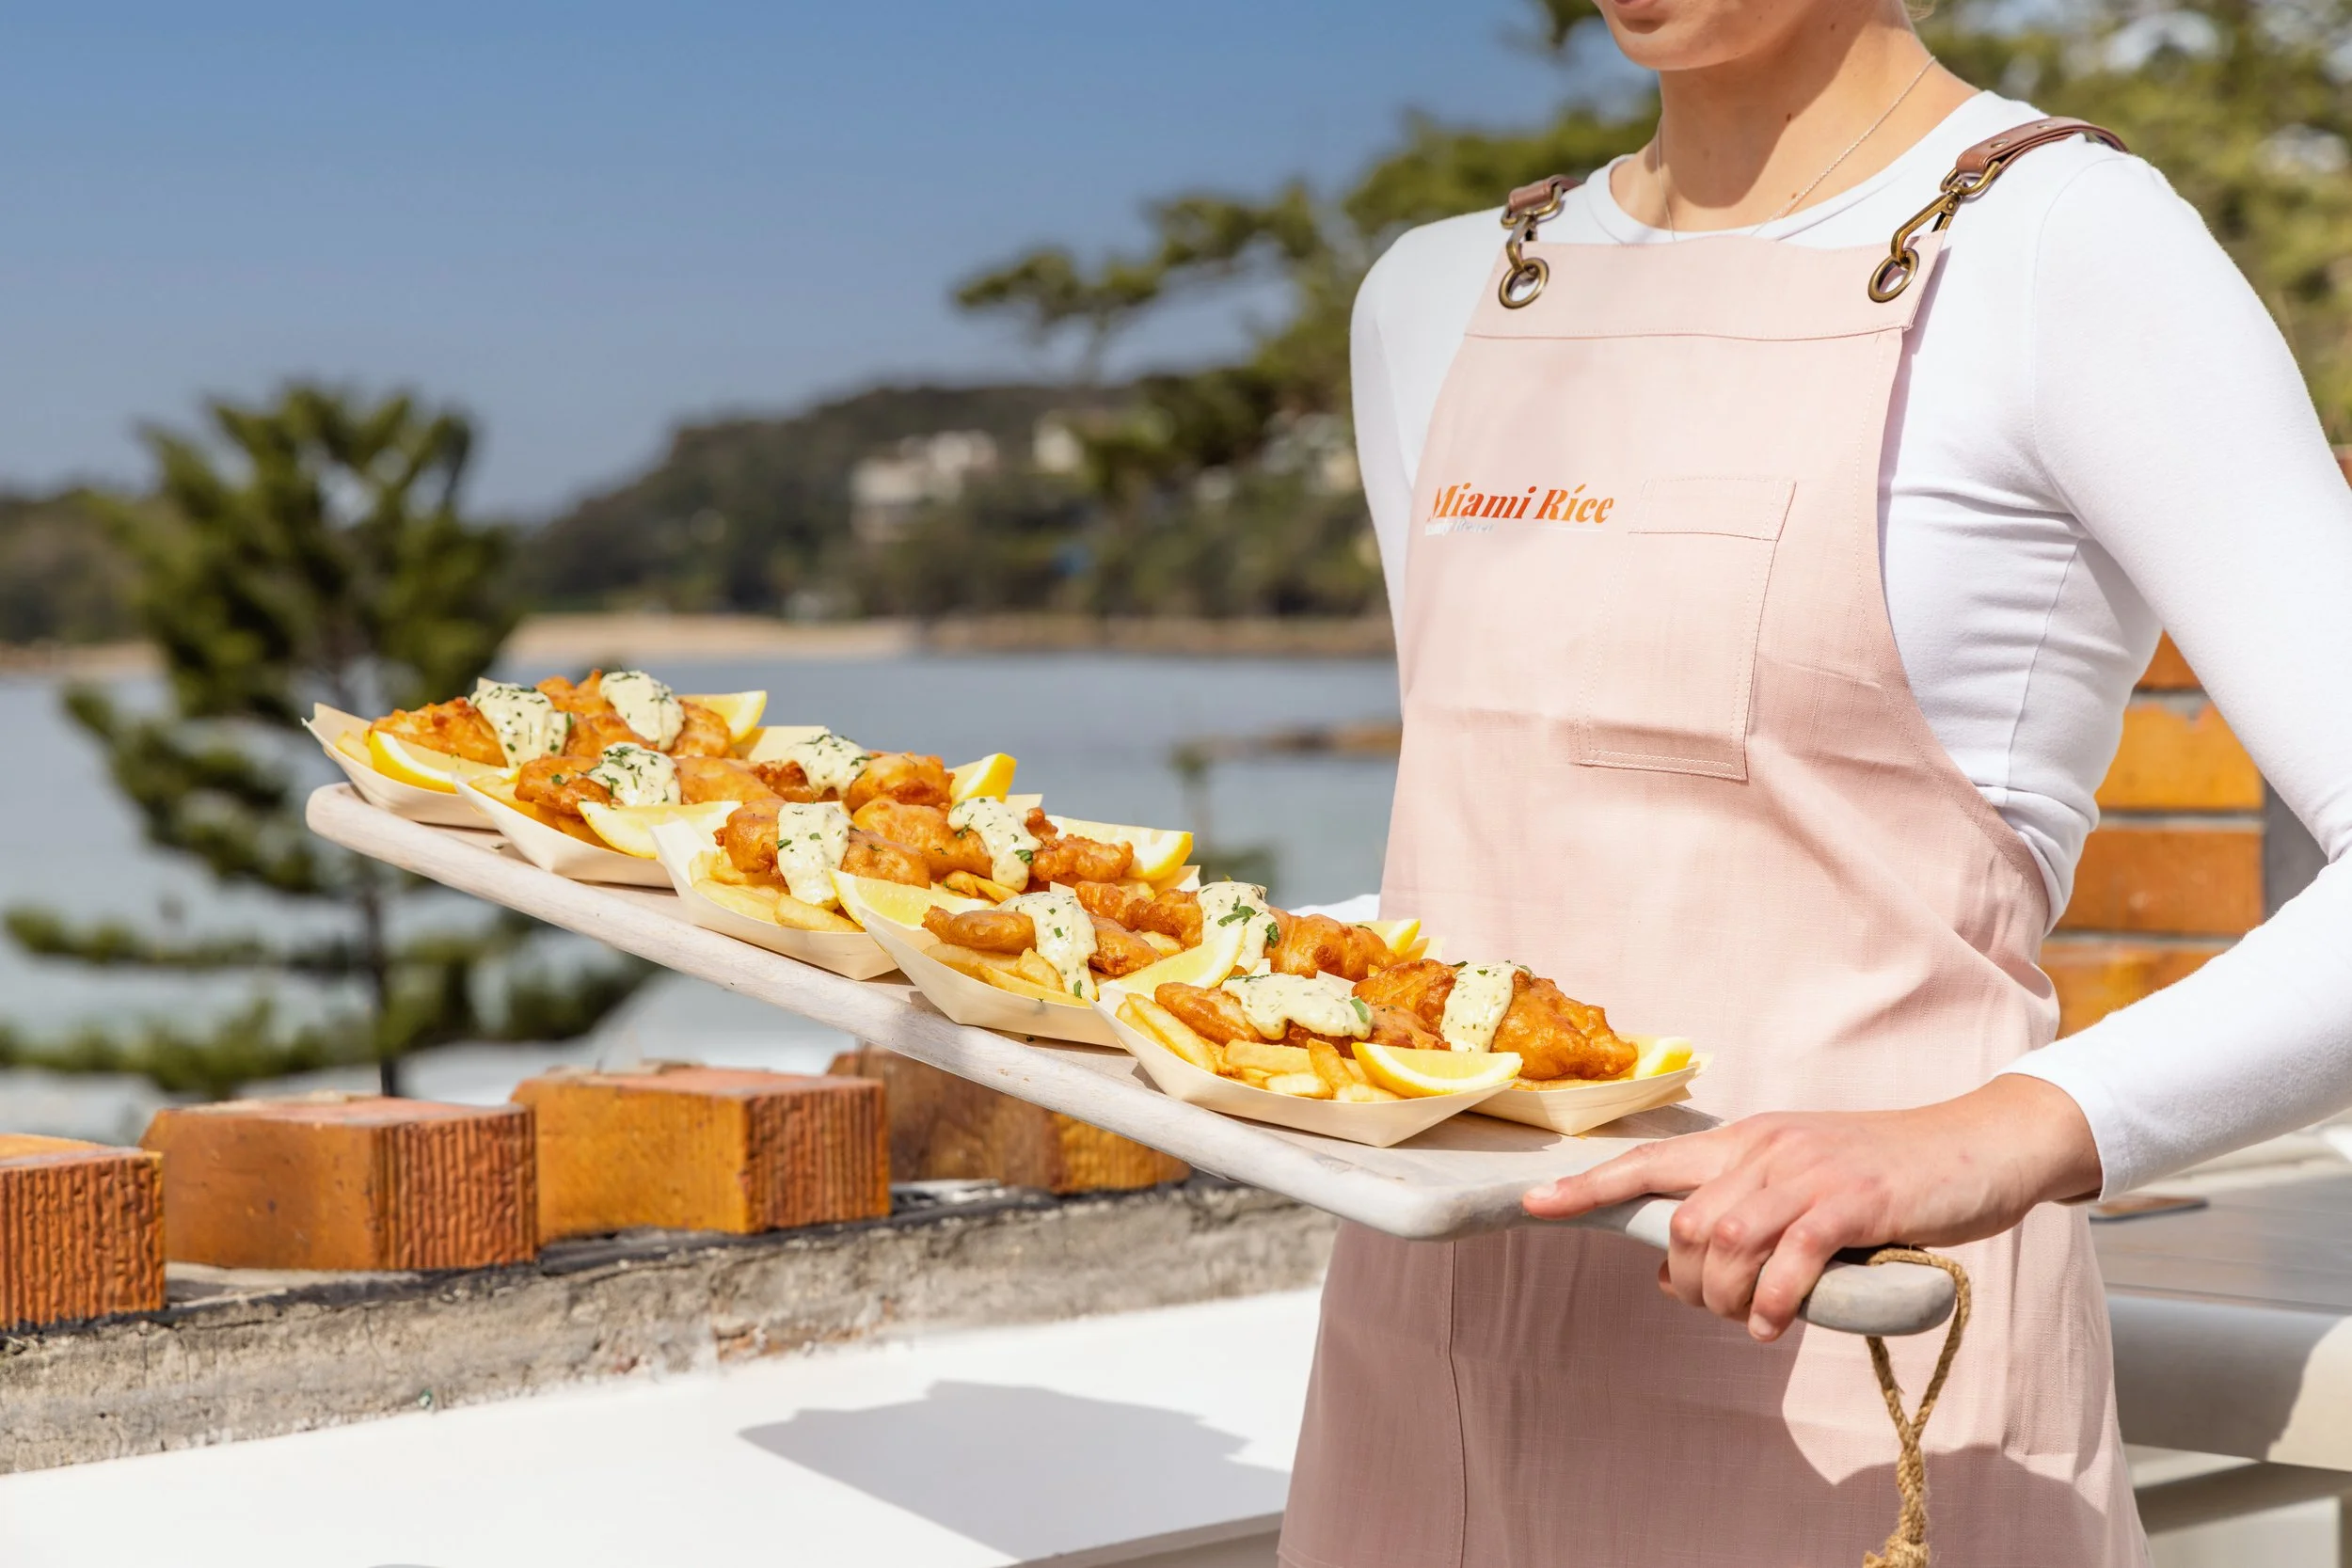
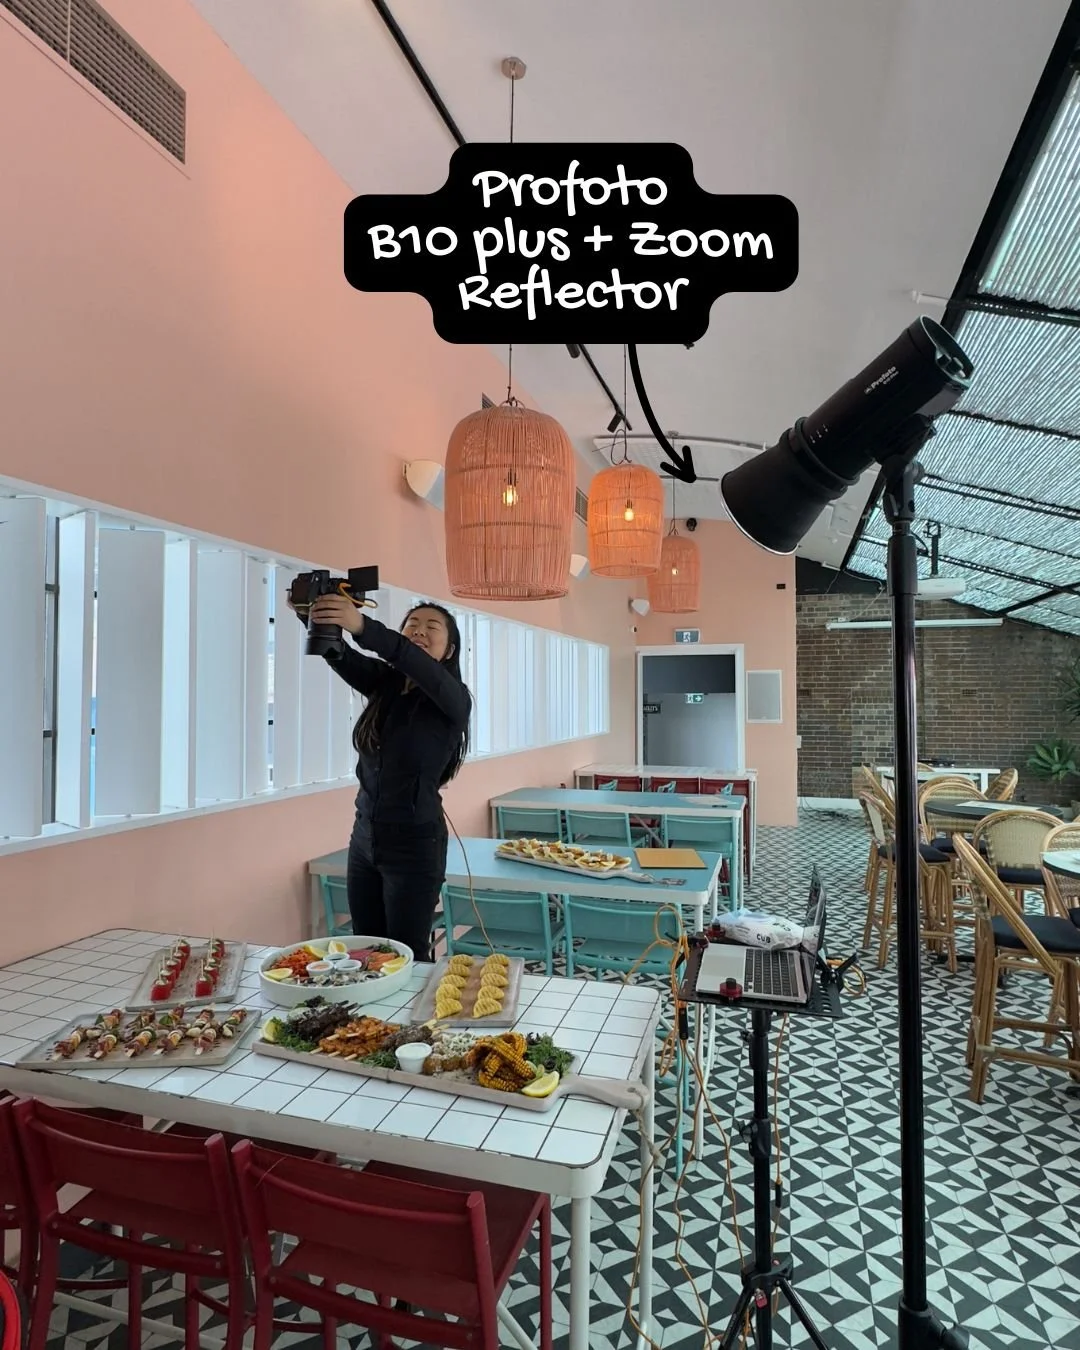
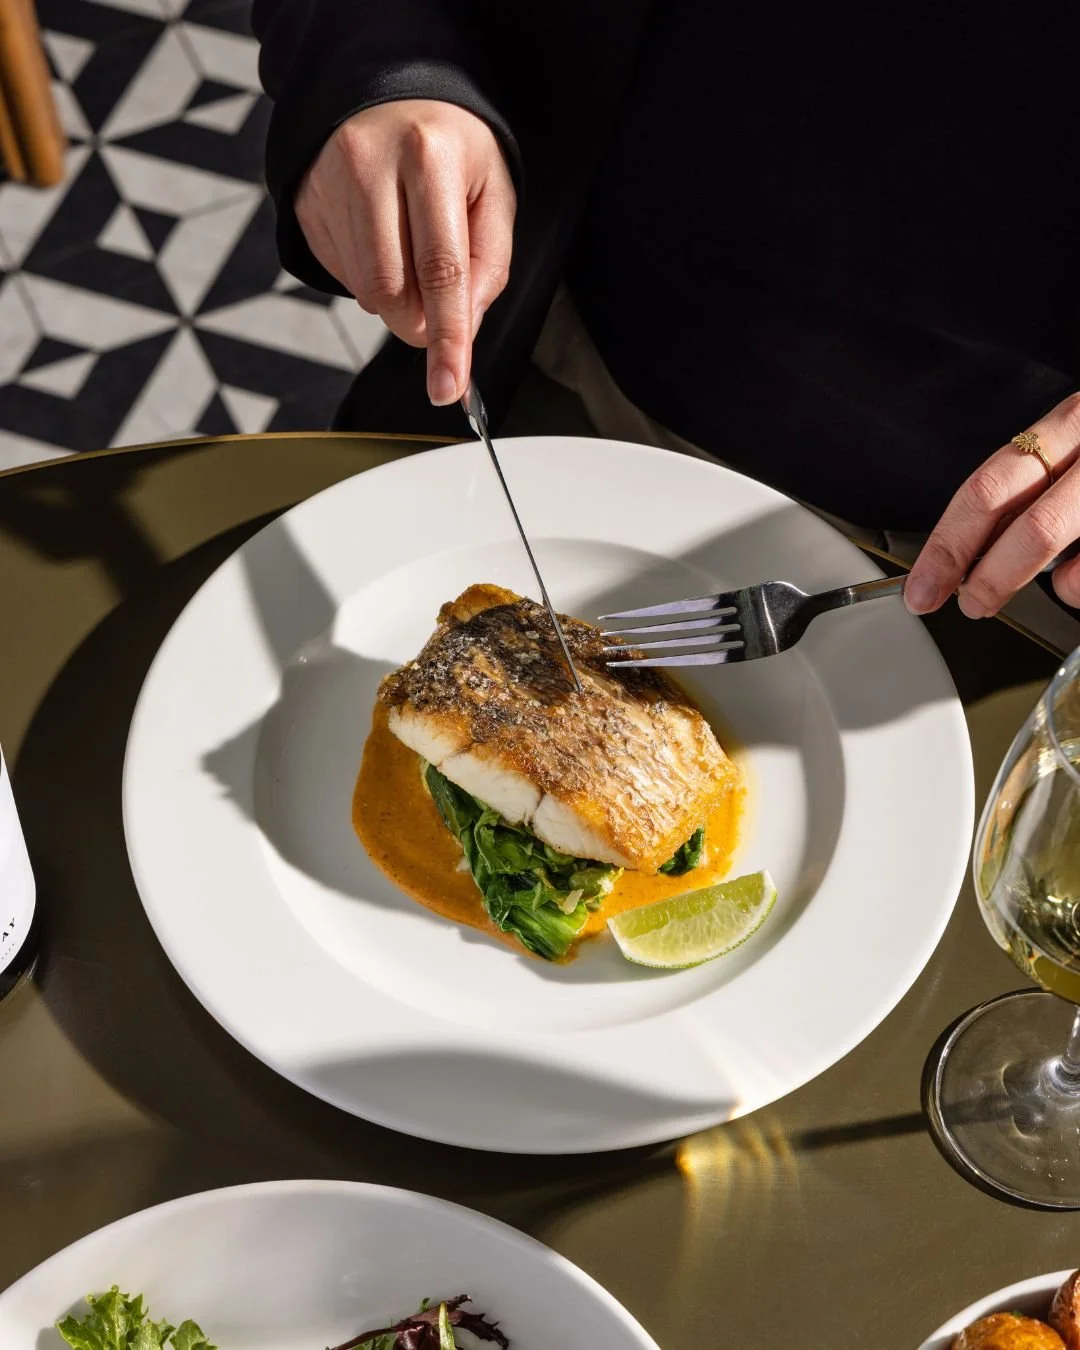
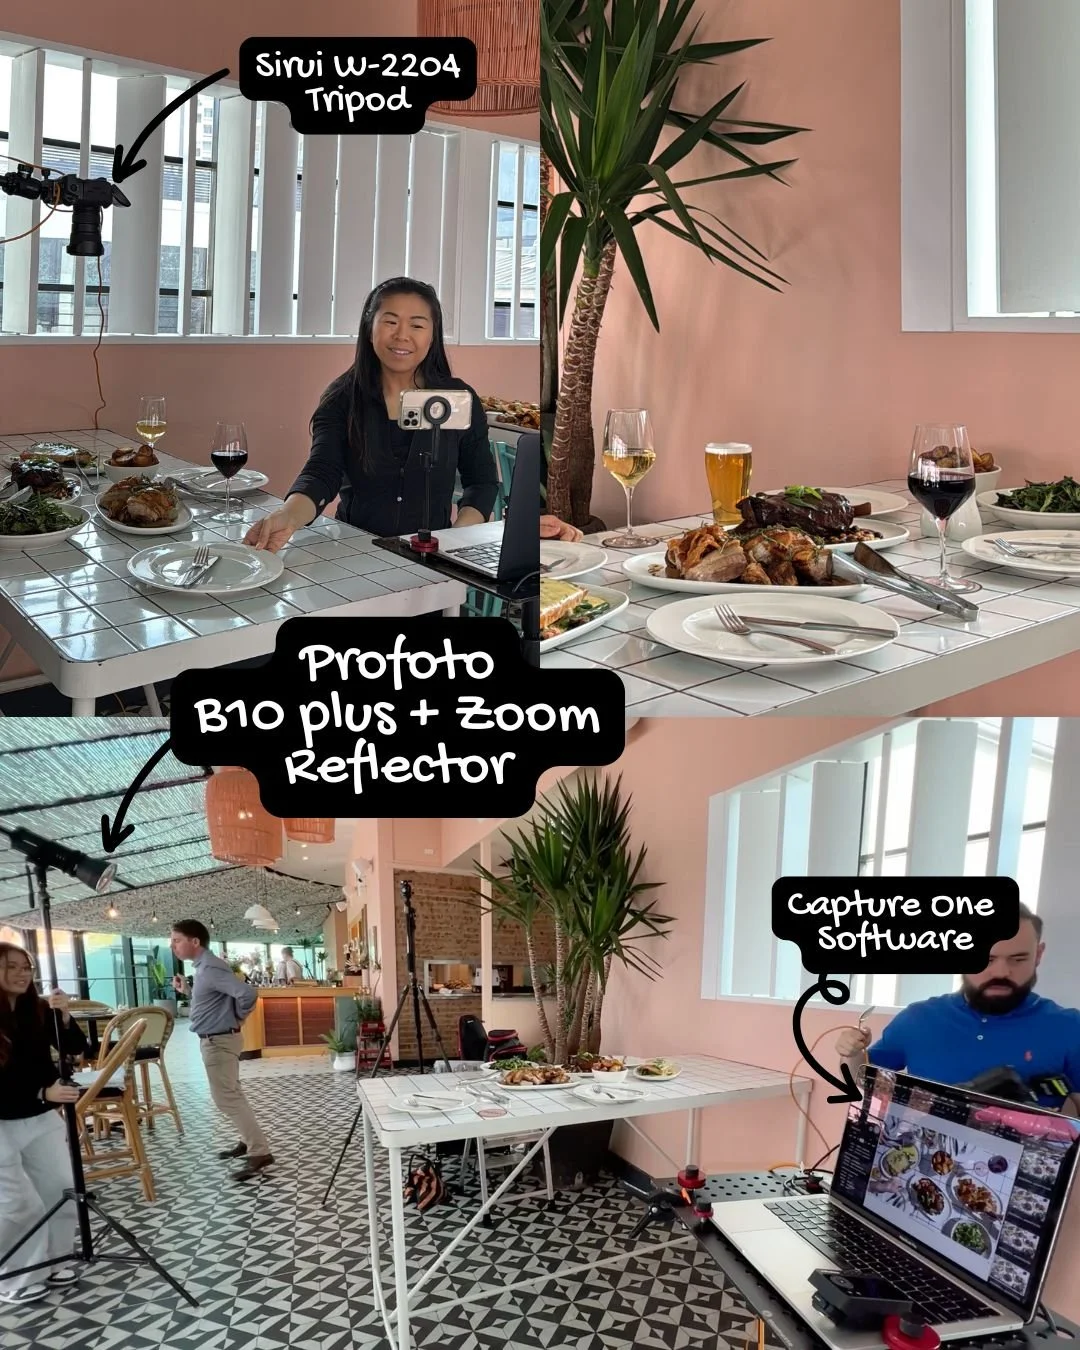
For professional-grade food photography, lighting is everything. My go-to for this shoot was the Profoto B10 Plus, paired with the Zoom Reflector. This combination is incredibly versatile. The B10 Plus gives me all the power I need in a compact, travel-friendly unit, while the Zoom Reflector allows me to efficiently shape the light, whether I'm aiming for soft, directional illumination for a main course (like the stunning fish dish) or a punchier effect for a flatlay.
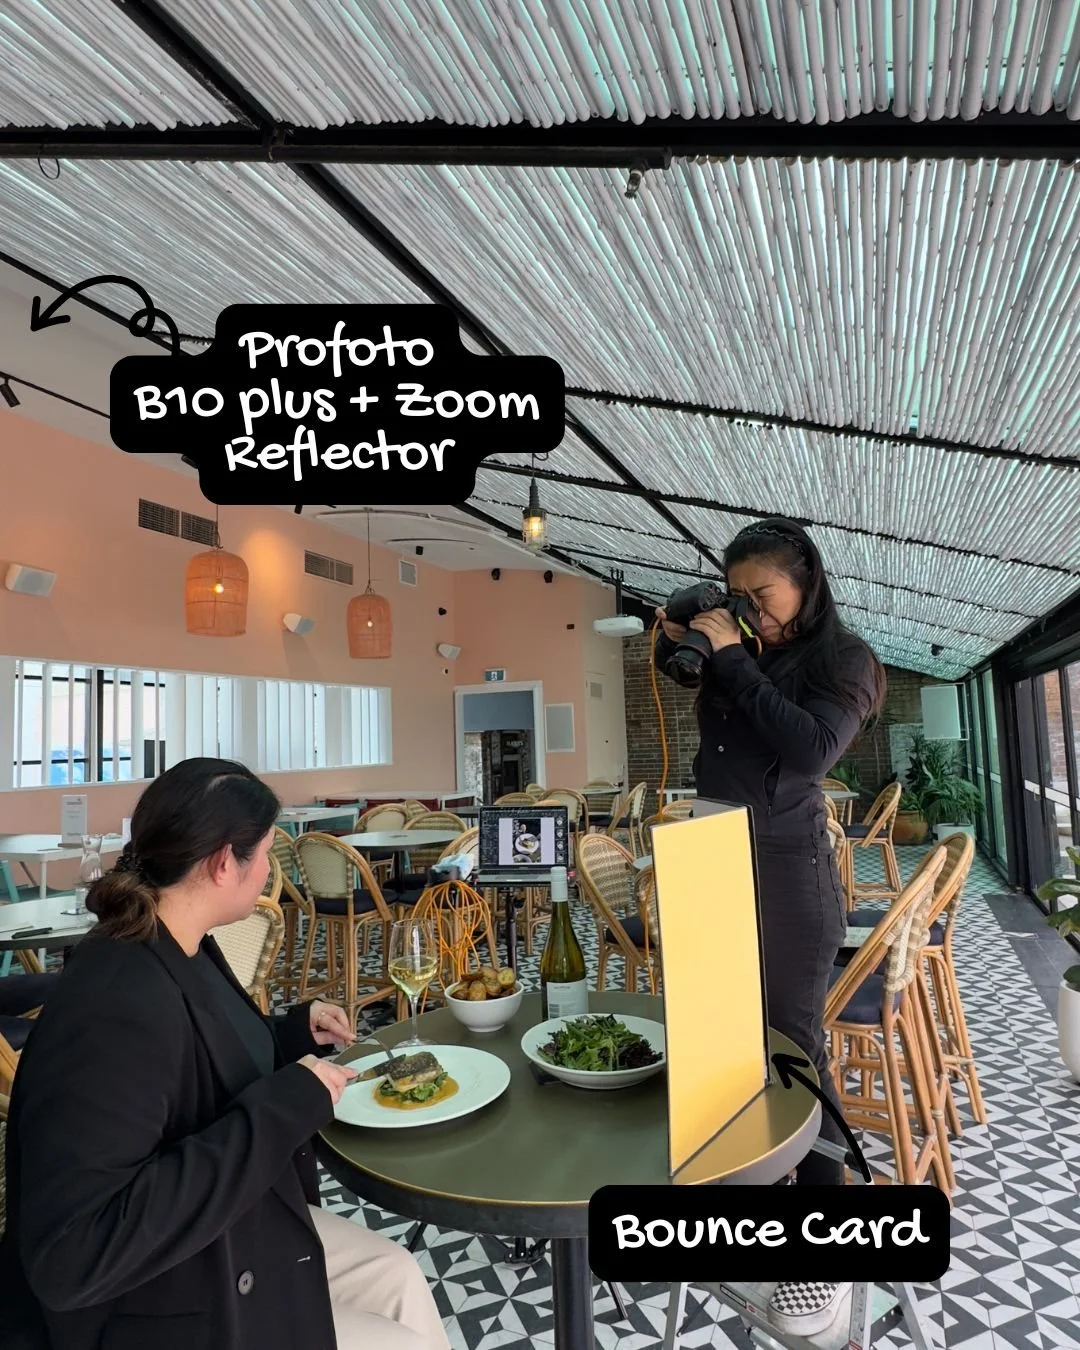
As you can see, I also incorporated a simple Bounce Card to delicately fill in shadows, ensuring the food always looked fresh and appealing, even when shooting closer-up on the indoor tables.
Creating the Look of Sun with the Zoom Reflector
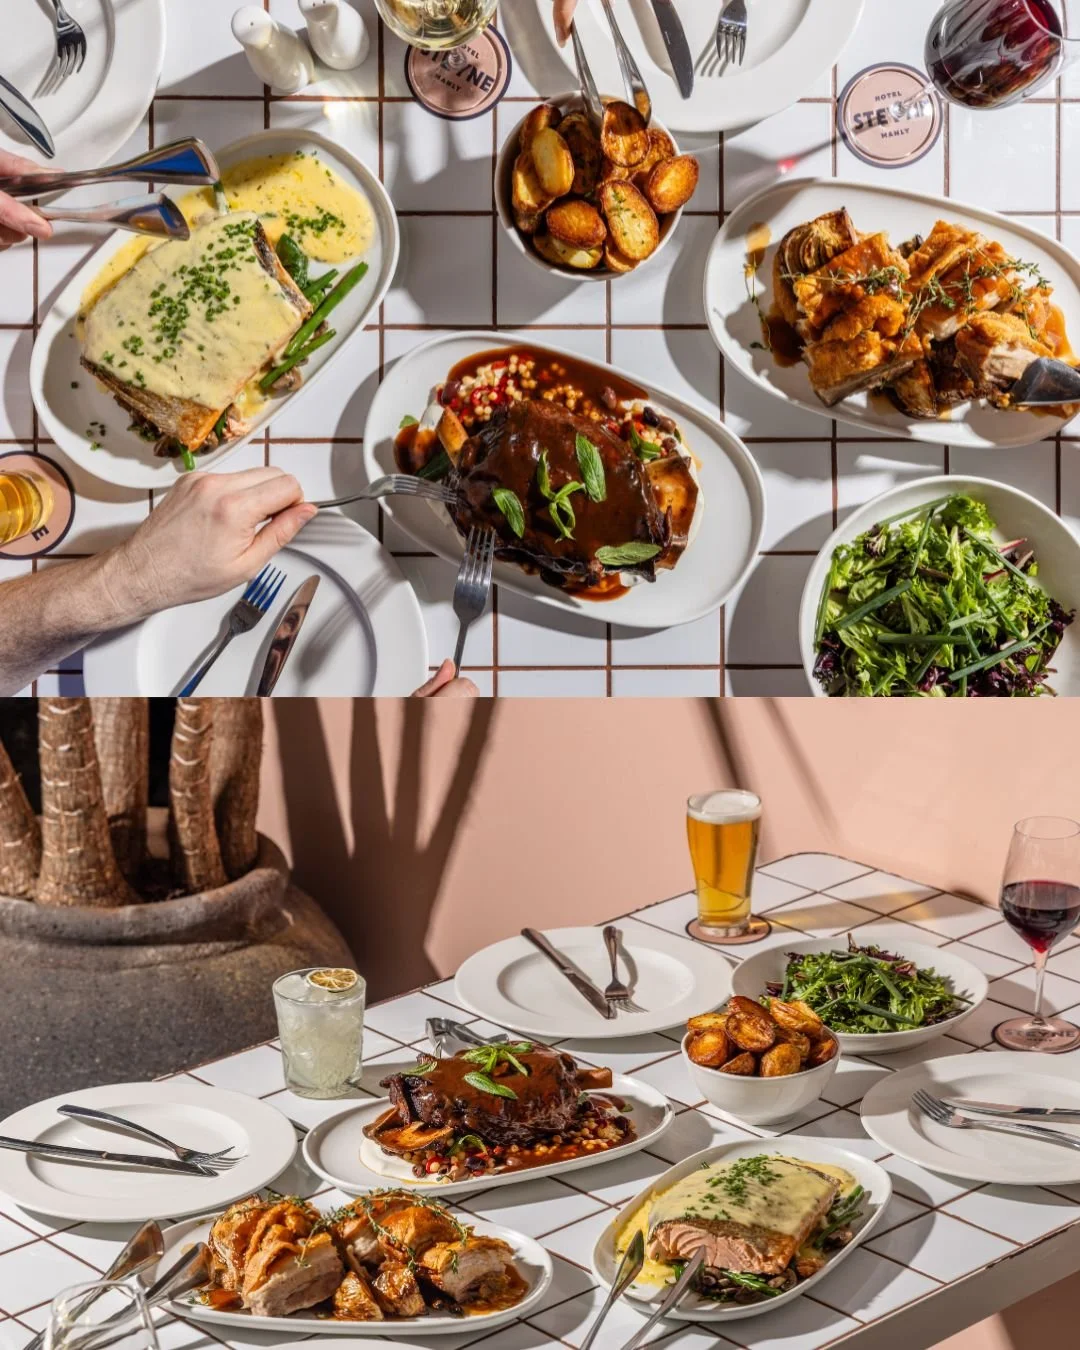
When shooting indoors or on an overcast day, losing that defined, contrasty look of natural sunlight can be a challenge—especially for food photography where texture and shadow definition are key. This is where the Profoto Zoom Reflector truly shines. Unlike a large softbox that creates a diffuse, cloudy-day look, the Zoom Reflector has a highly efficient, parabolic shape that concentrates the flash output into a punchy, directional beam. By using it to light the scene from an angle, I can easily mimic the hard shadows and specular highlights characteristic of bright, mid-day sun. This technique adds depth, texture, and a high-end, polished feel to the food and surfaces, giving the impression that the sun is streaming directly onto the table, even if the natural light is poor.
The Technical Workflow: Precision and Portability
Tethered shooting is non-negotiable for commercial work, which is why I relied on Capture One Software throughout the day. Tethering allows for immediate review on a larger screen, which is crucial for checking focus, styling, and lighting in real-time with the client. For stable, precise camera positioning, especially for the high-angle overhead shots of the grazing platters, the Sirui W-2204 Tripod offered the stability and height I needed. This setup ensures technical perfection from the moment the shutter fires.
Capturing the Moment: The Canon R5 and RF 24-105mm
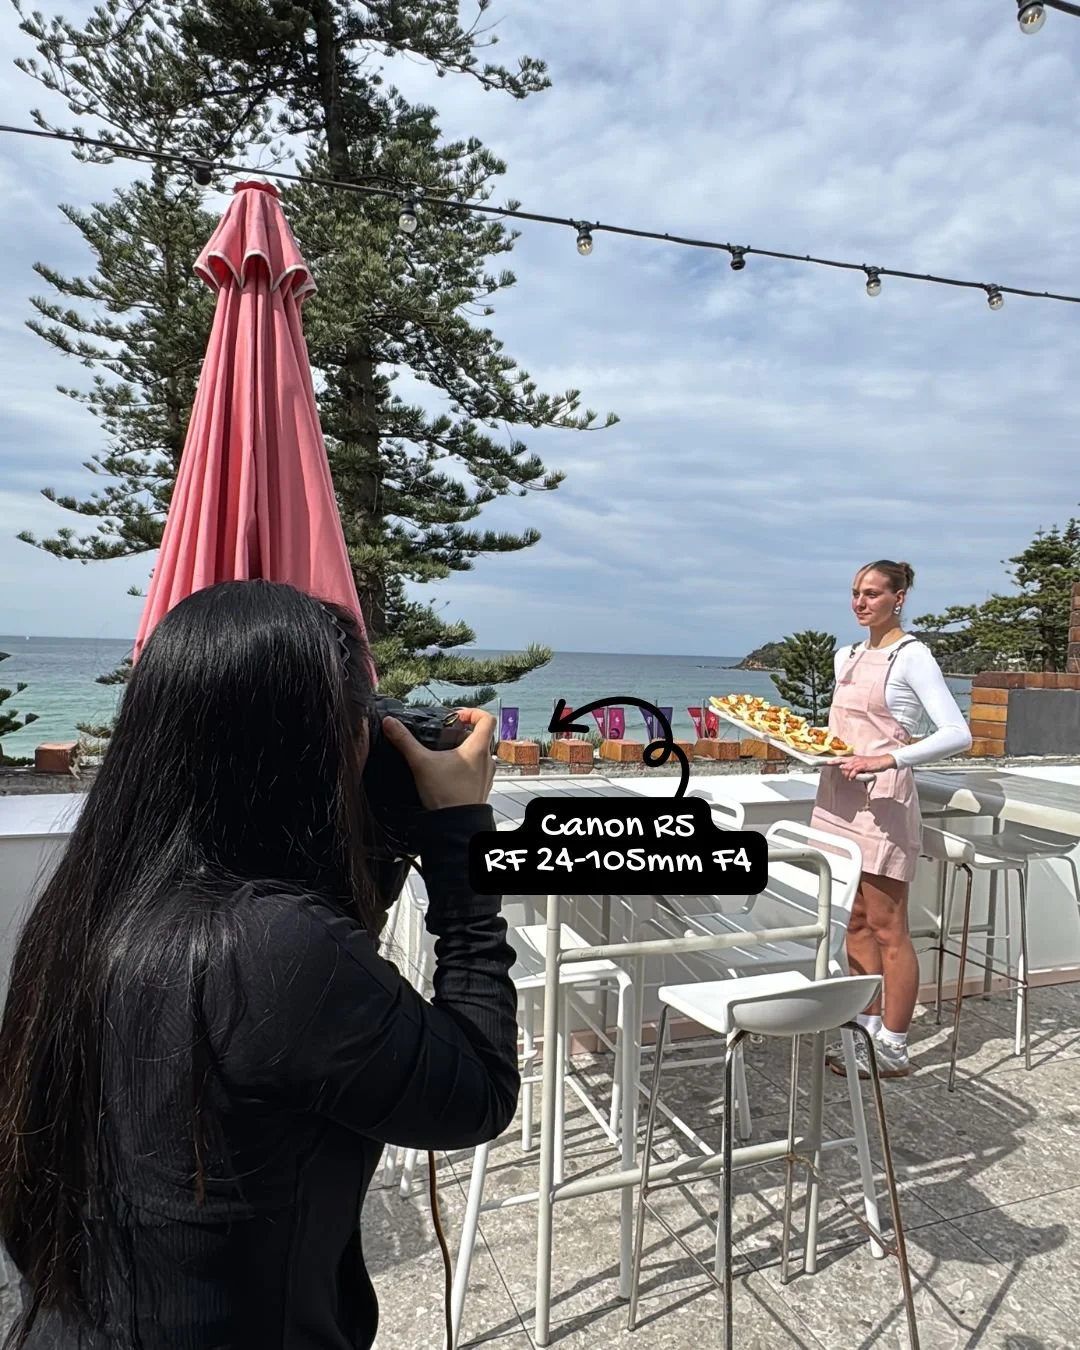
For the actual capture, my workhorse setup was the Canon R5 paired with the RF 24-105mm F4 lens. This lens is a fantastic all-rounder for commercial location photography. The 24-105mm range covers everything from wide scene shots—like the model holding the platter on the rooftop—to the tighter compositions needed for the dining table setup. The constant F4 aperture provides excellent performance and sharpness, making it a reliable choice when moving quickly between different scenes and ensuring consistent, professional results regardless of the ambient lighting conditions.