

Behind the Scenes: A Stunning Seafood Photoshoot
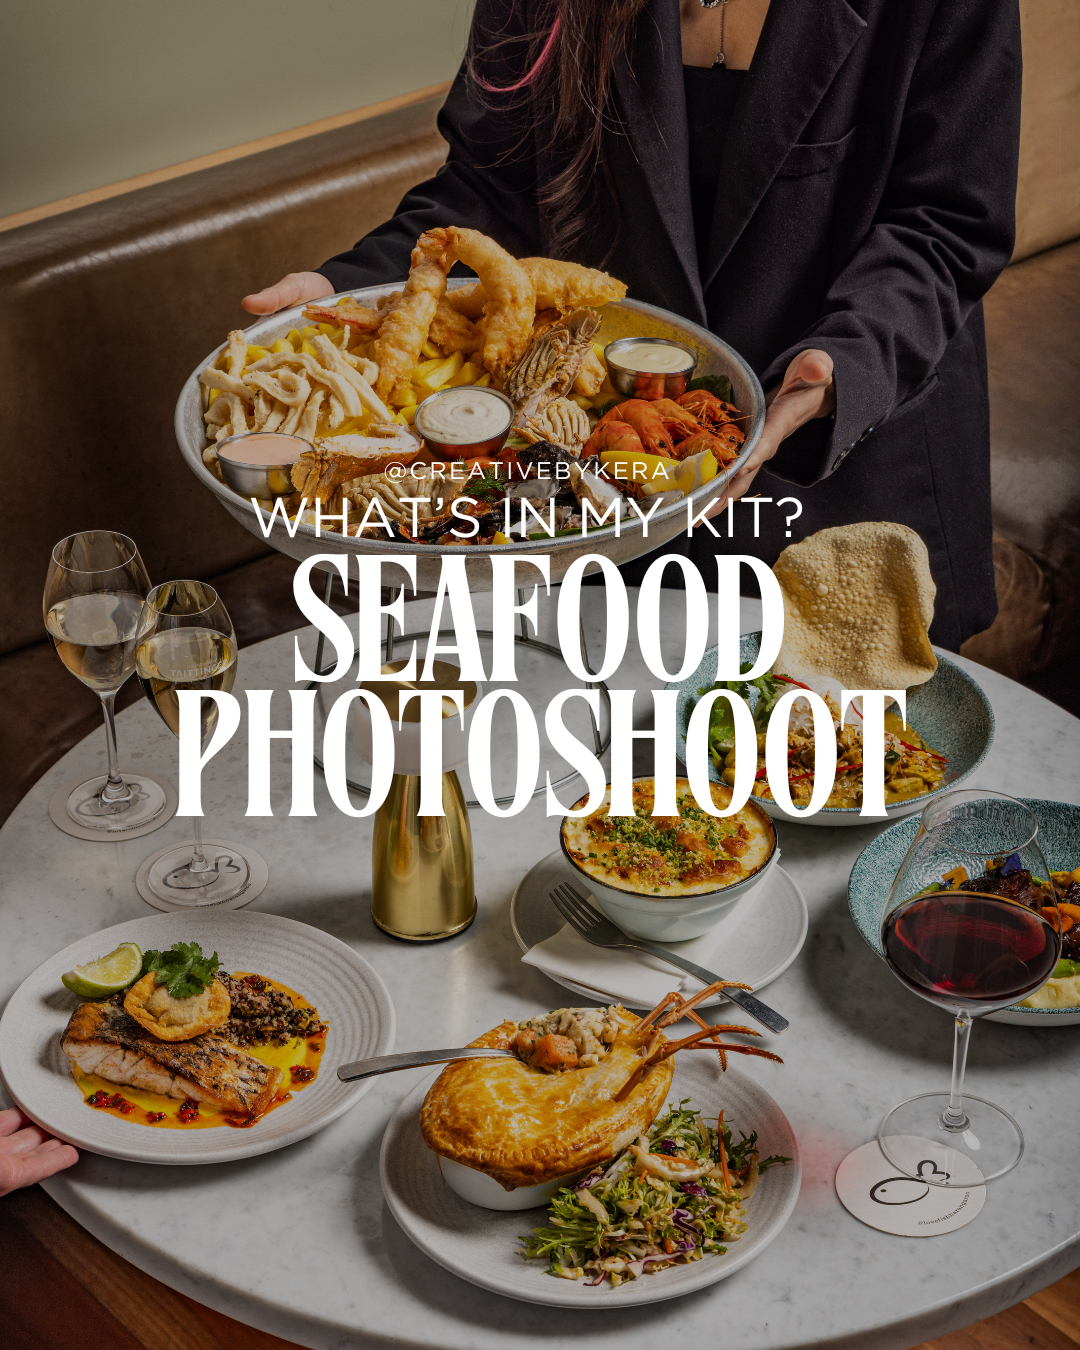
What's In My Kit? Crafting the Perfect Shot
I recently had the pleasure of photographing an incredible spread of seafood, and I wanted to give you a behind-the-scenes look at the gear and lighting setup used to achieve these mouth-watering results. Food photography in a restaurant setting can be tricky, but with the right equipment and technique, we can create studio-quality images that pop!
The Goal: Cinematic, Appetising, and Natural
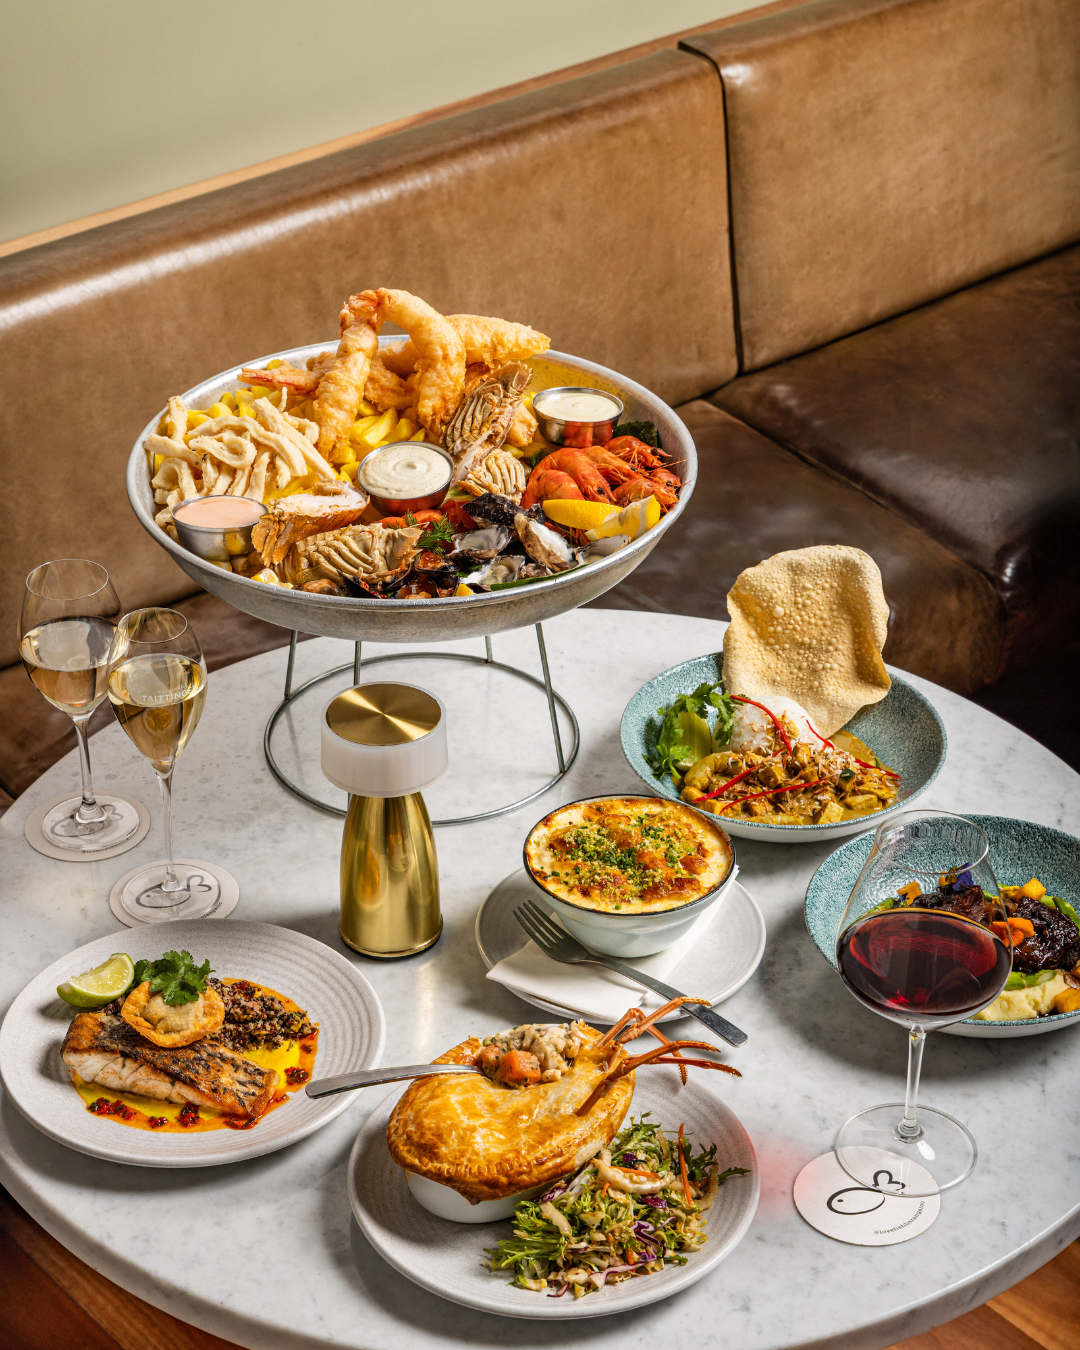
The objective was to capture the richness, texture, and colour of the seafood while utilising the restaurant's beautiful ambient light and complementing it with controlled artificial lighting. The final images, like the wide table shot and the close-ups, speak for themselves; they are bright, detailed, and incredibly appetising.
My Essential Gear List
Here is a breakdown of the key components that made this shoot a success:
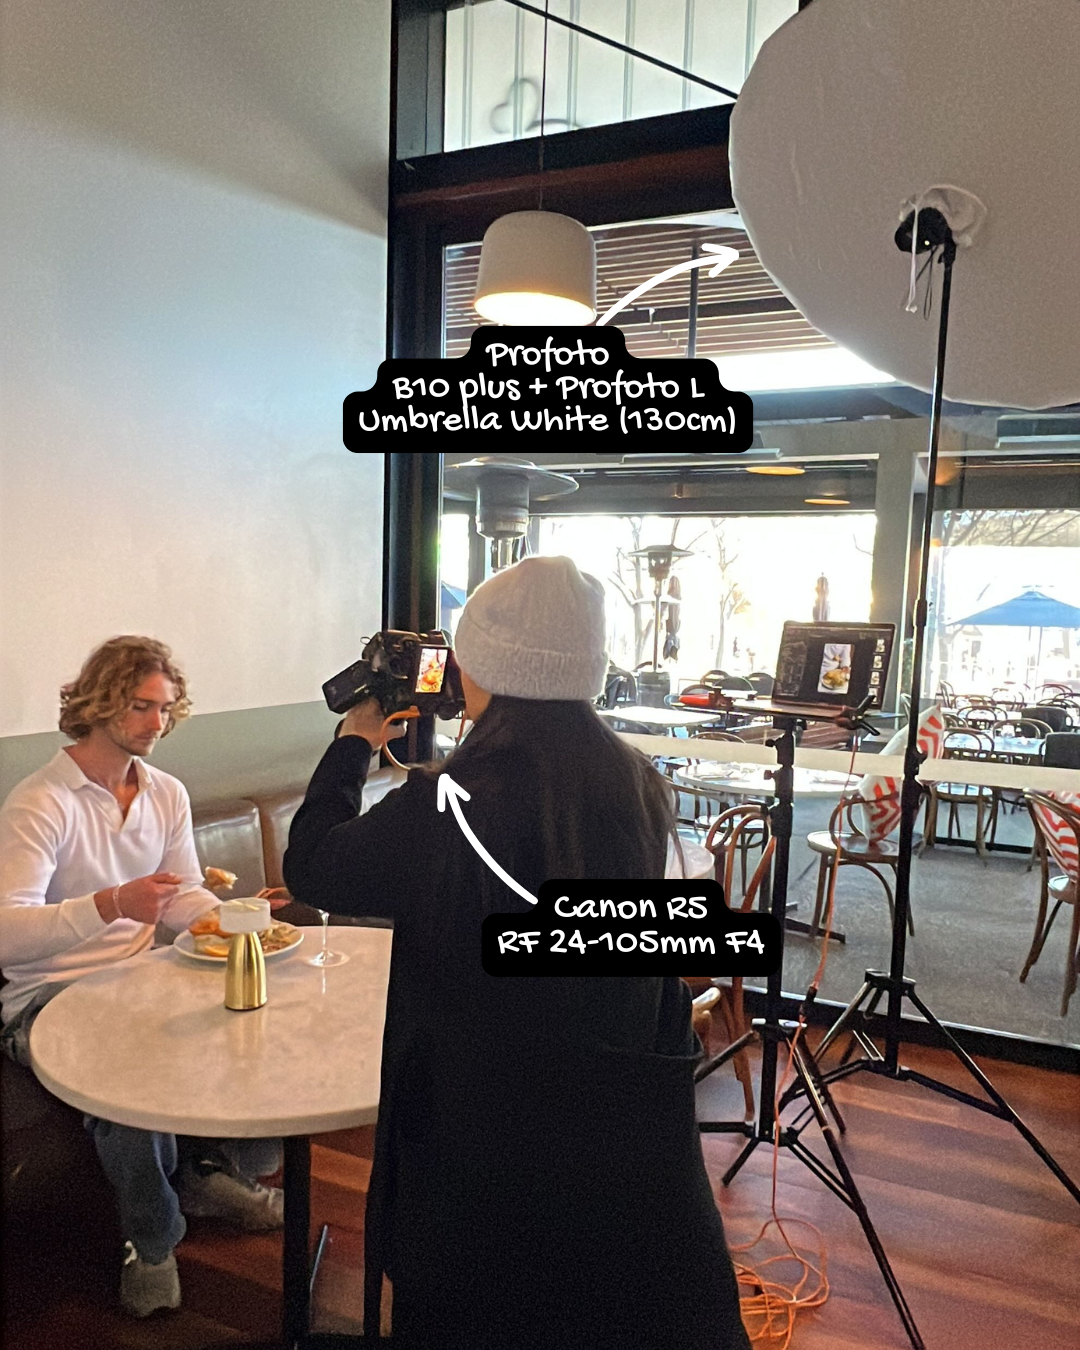
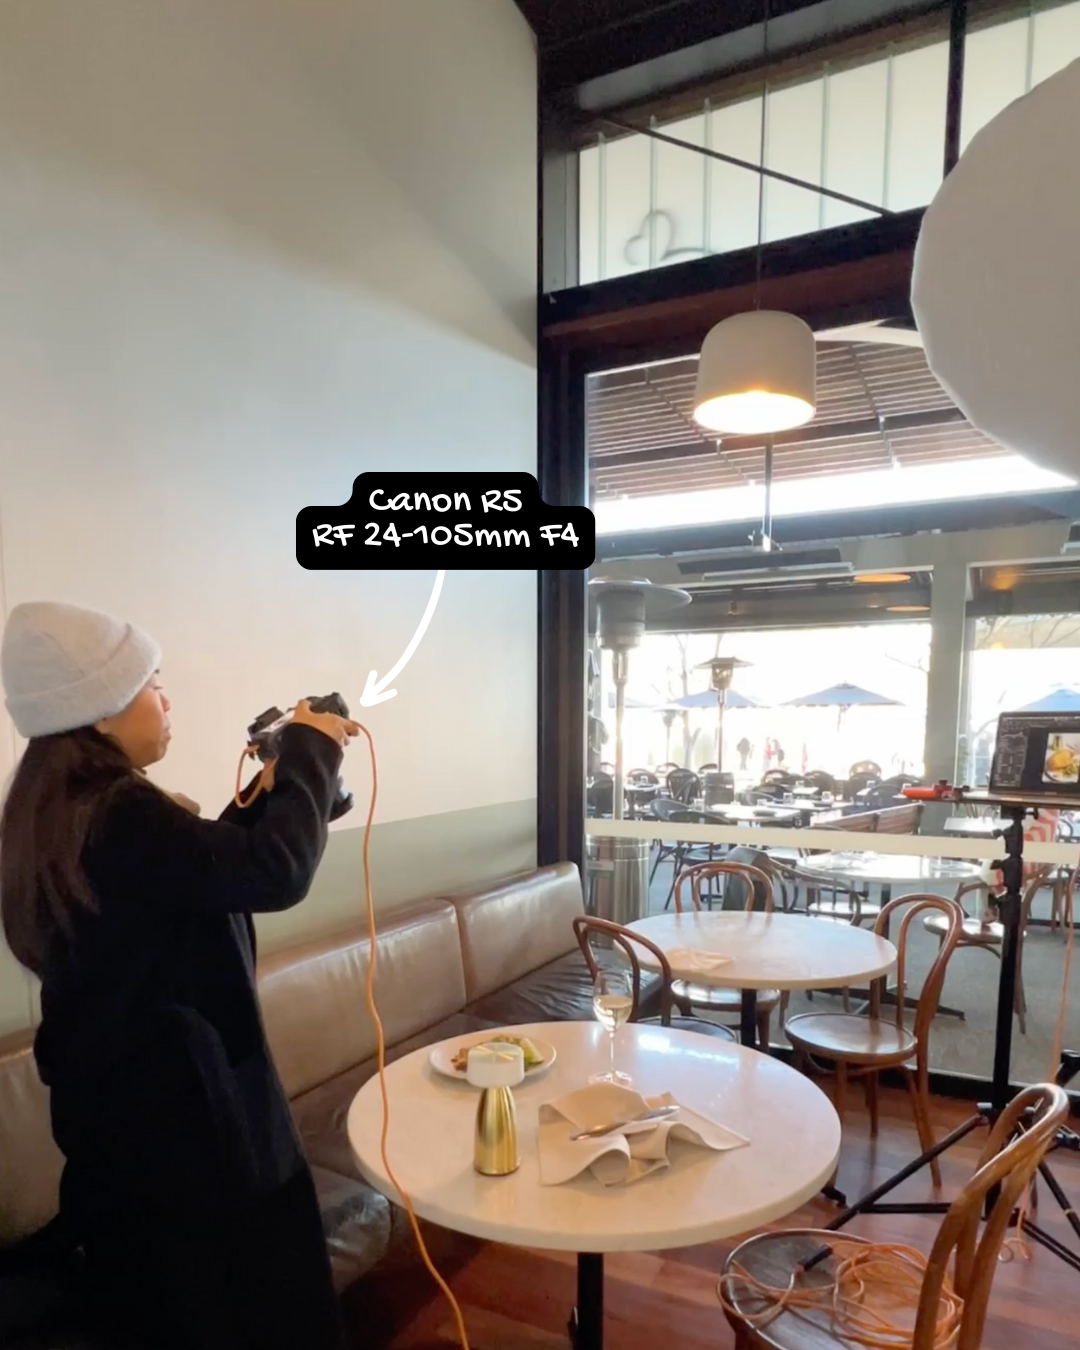
Camera & Lens: The core of the setup was the Canon R5 paired with the versatile RF 24-105mm F4 lens.
Why this choice? The Canon R5 offers high resolution and exceptional dynamic range, which is critical for food photography where you need to preserve detail in both the bright white plates and the darker food elements. The 24-105mm is a fantastic workhorse zoom, offering flexibility to capture wide table shots and detailed close-ups without having to constantly switch lenses.
Lighting & Modifier (The Key to the Look):
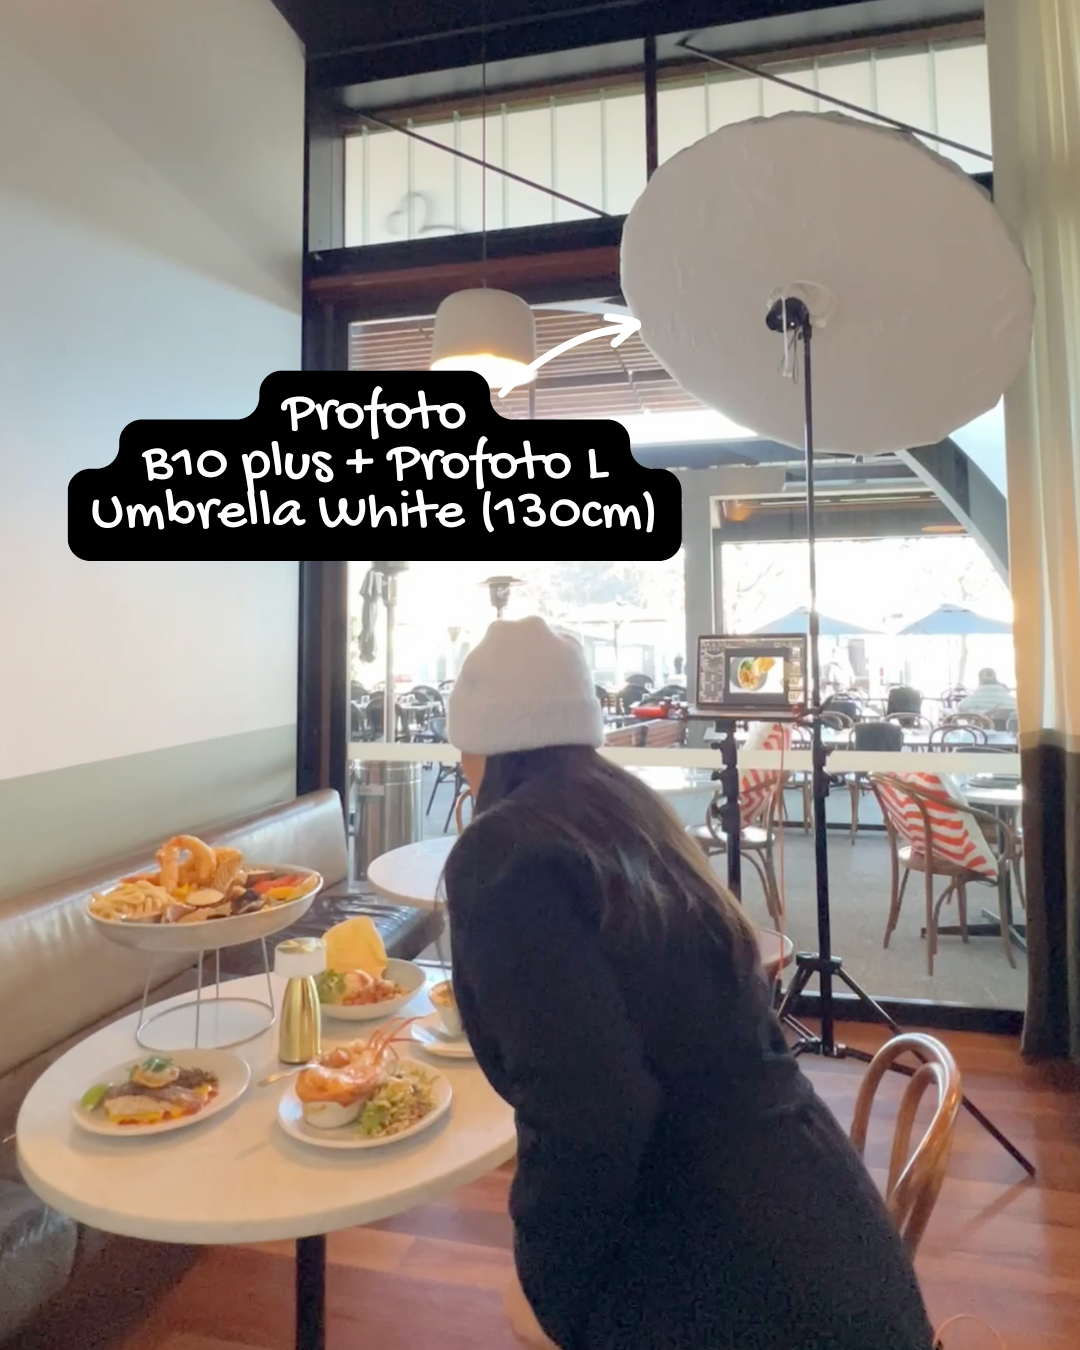
Light: Profoto B10 Plus
Modifier: Profoto L Umbrella White (130cm)
Why this setup? The Profoto B10 Plus is a powerful, compact studio light. When paired with a large, white umbrella (130cm!), it creates an incredibly soft, expansive light source. This is crucial for mimicking beautiful, flattering natural window light. The large modifier was positioned near the window and directed toward the food to gently wrap the light around the dishes, eliminating harsh shadows and bringing out the texture of the lobster pie crust and the glistening fish skin.

Camera Settings for the Photoshoot
1. Camera Mode: Manual (M)
Why: In flash photography, using Manual mode gives the photographer complete, independent control over Aperture, Shutter Speed, and ISO. This is essential for controlling the ratio between the flash (which controls the food's exposure) and the ambient light (which controls the background's darkness/mood).
2. ISO: 100
Rationale: When using a powerful external flash like the Profoto B10 Plus, you want your ISO to be as low as possible (typically ISO 100) to achieve the cleanest, noise-free image quality. The flash provides all the necessary light, so there's no need to increase the sensor's sensitivity.
3. Shutter Speed: 1/125 sec to 1/200 sec
Rationale: This range is essential for flash synchronisation.
The Canon R5's mechanical flash sync speed is typically 1/200 sec (depending on specific mode/settings). Choose a speed at or slightly below the maximum sync speed (like 1/160 sec or 1/200 sec) to ensure the entire sensor is exposed when the flash fires, avoiding the dark band of a partially closed shutter.
Crucially: Since the flash is so fast (the light duration itself freezes motion), the shutter speed primarily controls how much ambient (background) light is captured. Keeping it fast (1/200s) helps darken the background and make the subject pop, which is a common commercial food look.
4. Aperture (F-Stop): f/5.6 to f/11
Rationale: The Aperture is the main setting used to control the exposure of the food illuminated by the flash, and the Depth of Field (DoF).
Overhead Shots: For a flatlay or a wide shot showing the entire table, choose a narrower aperture, around f/8 to f/11. This ensures that multiple dishes and items across the table (foreground to mid-ground) are acceptably sharp and in focus.
Close-Up Shots: For a hero shot of a single dish, start with a wider aperture, like f/6.3. This provides enough depth of field to keep the main dish perfectly sharp while creating a soft, pleasing blur (bokeh) in the immediate foreground/background, drawing the viewer's eye right to the food.
5. White Balance: Set to Flash (5500K)
Rationale: Professional flashes like the Profoto B10 are calibrated to emit light at approximately 5500 Kelvin (daylight/midday sun). Setting the camera's White Balance to 5500K or the dedicated "Flash" preset ensures accurate and neutral color reproduction, which is vital for making food look true-to-life and appealing.
These controlled settings ensure maximum image quality, the ability to freeze any slight movement (of steam, etc.), and consistent, repeatable results.

The Lighting Strategy
You can see in the setup photos that the light was positioned right next to the window. This common technique in food photography is known as "feigned window light" or "amplified ambient light."
Natural Base: The large restaurant windows provided a soft, ambient light foundation.
Light Placement: The large Profoto umbrella was positioned to act as a massive, soft key light, mimicking the direction and quality of the best natural light you could hope for.
Result: The flash output was carefully tuned to be slightly brighter than the ambient light, giving the final image a crisp, high-impact look while maintaining a natural, restaurant-vibe feel.

Final Thoughts
This photoshoot is a perfect example of how combining high-quality gear with thoughtful lighting can elevate commercial food photography. You don't always need a dozen lights—sometimes, one large, soft light source is all it takes to bring a table full of delicious food to life.