
Food Menu Photoshoot: What's In My Professional Kit
Behind the Scenes of a Food Menu Photoshoot
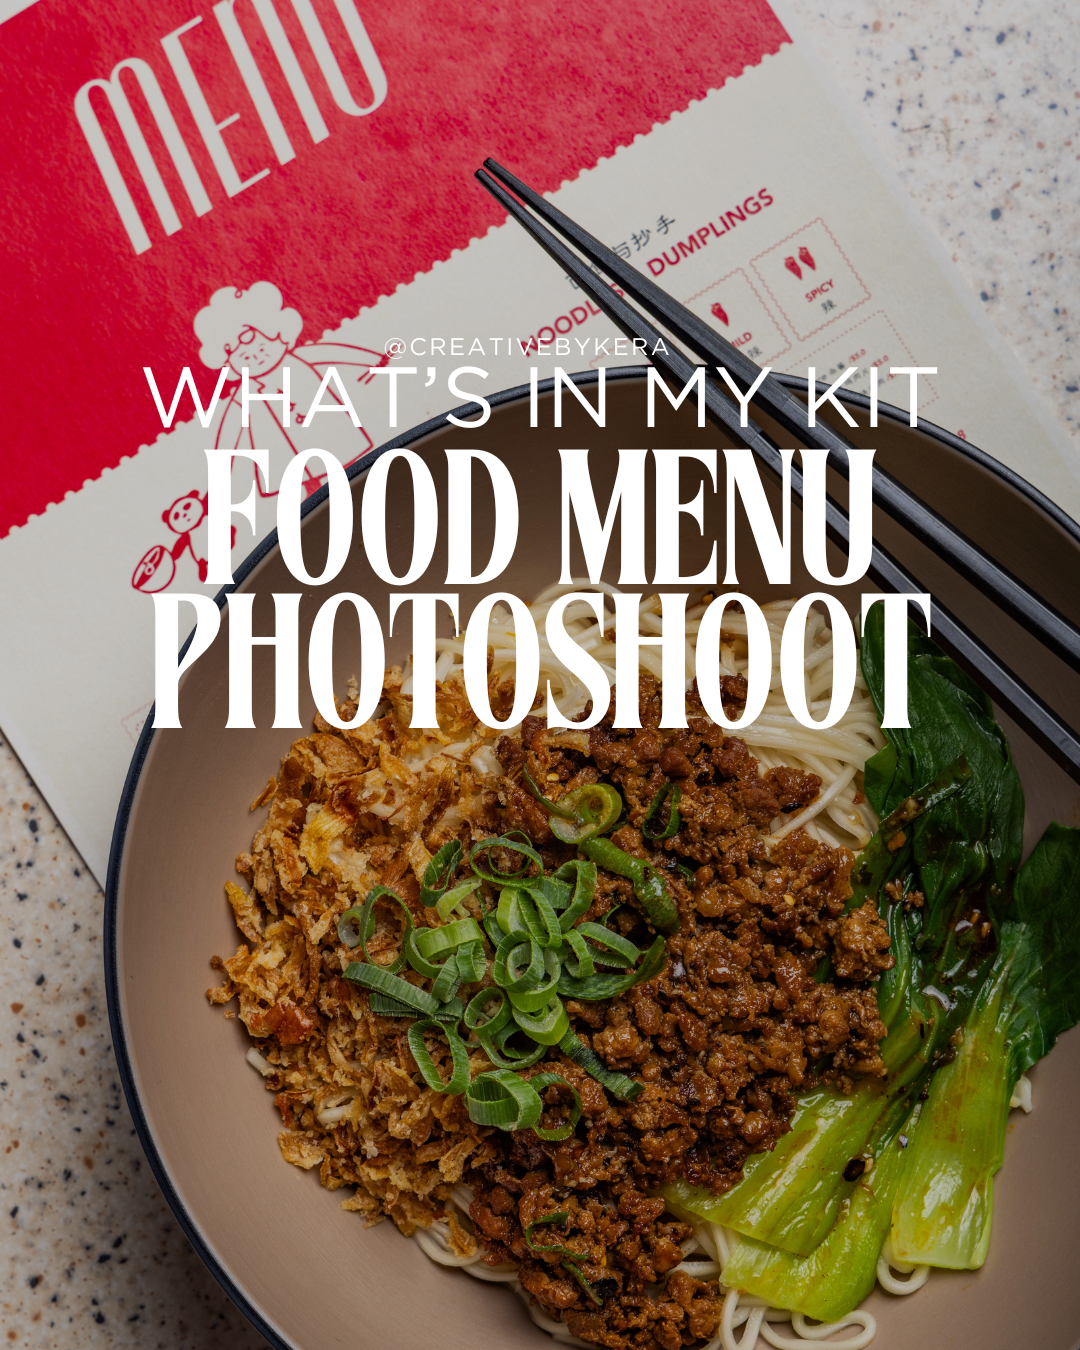
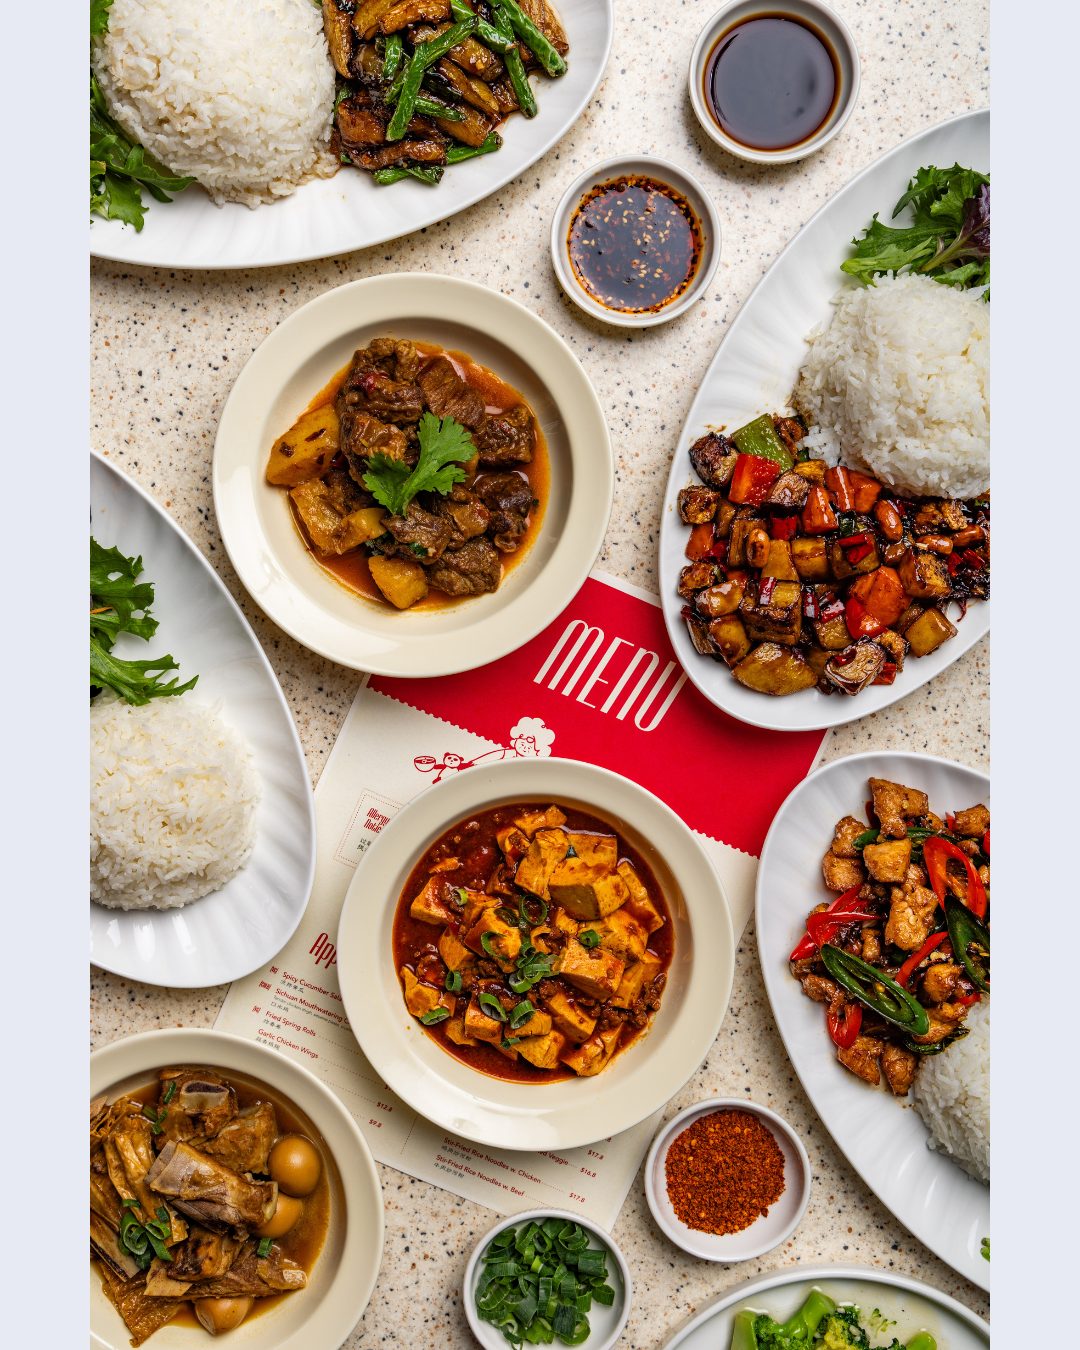
Taking mouth-watering photos for a restaurant menu requires more than just a good eye; it demands the right gear and a solid workflow. We're giving you an exclusive look behind the scenes of a recent food menu photoshoot, detailing the equipment used and the setup required to capture these delicious dishes!
The Challenge: Capturing Authentic Flavour
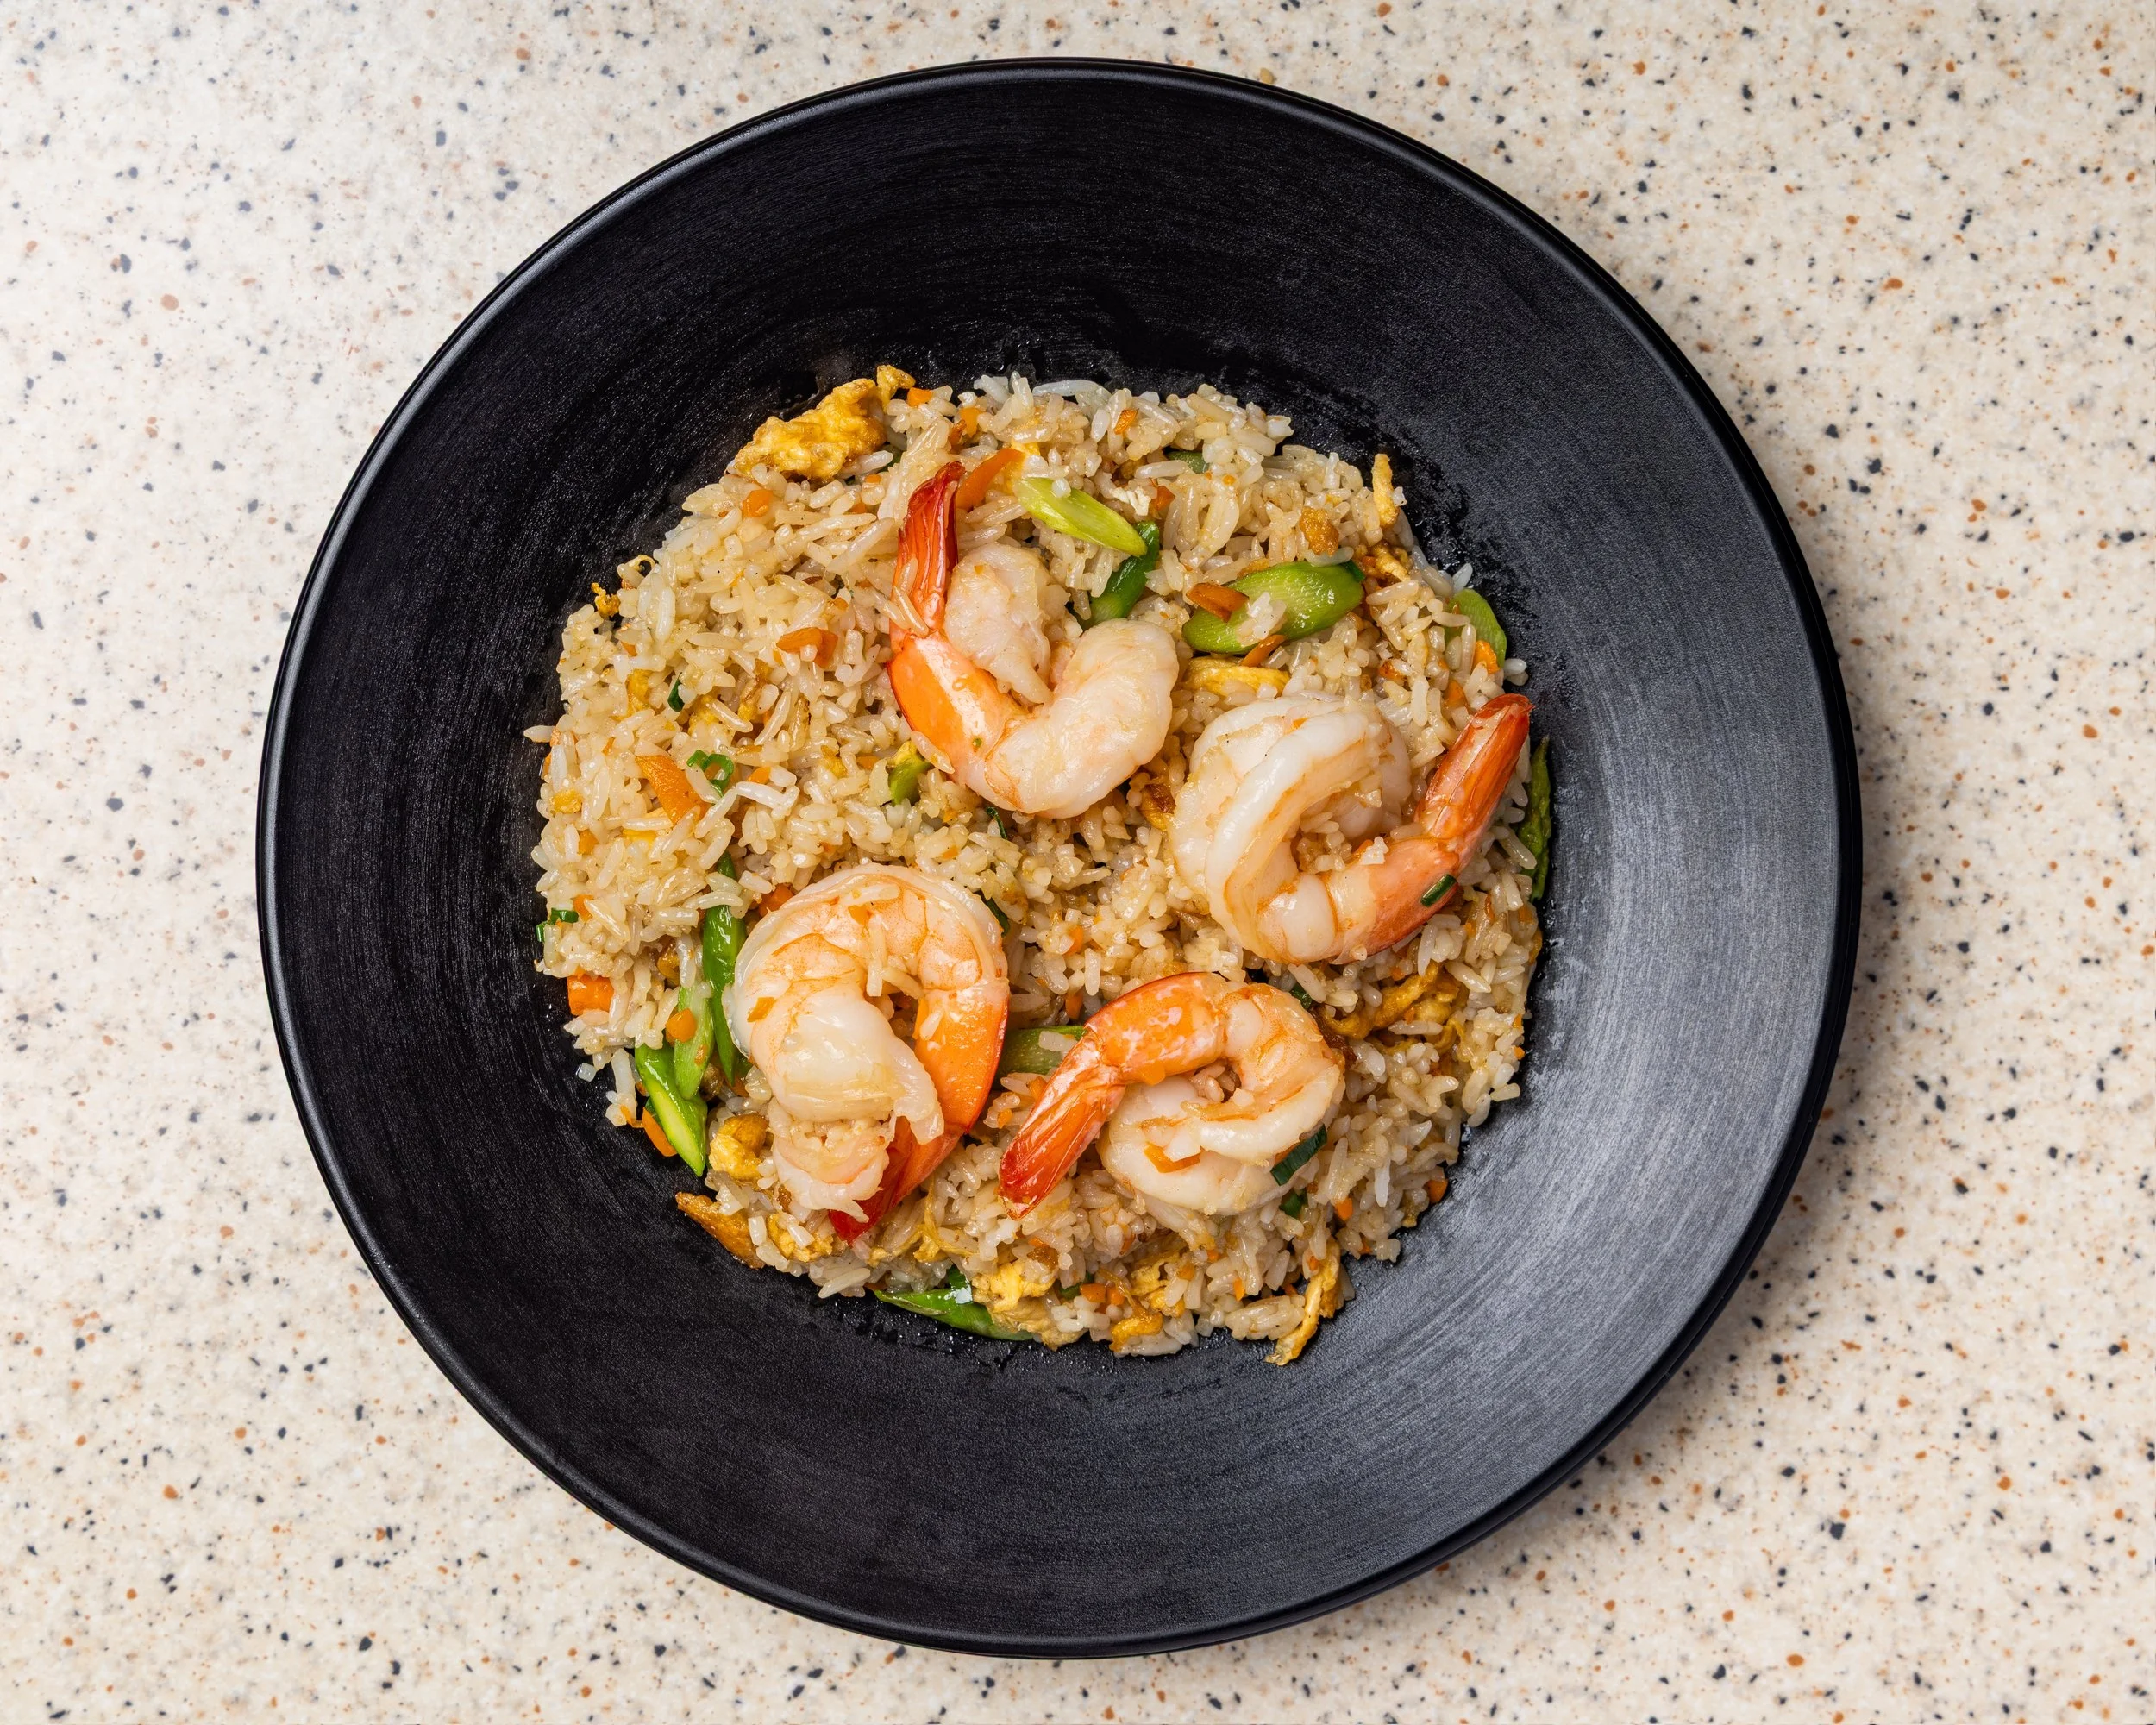
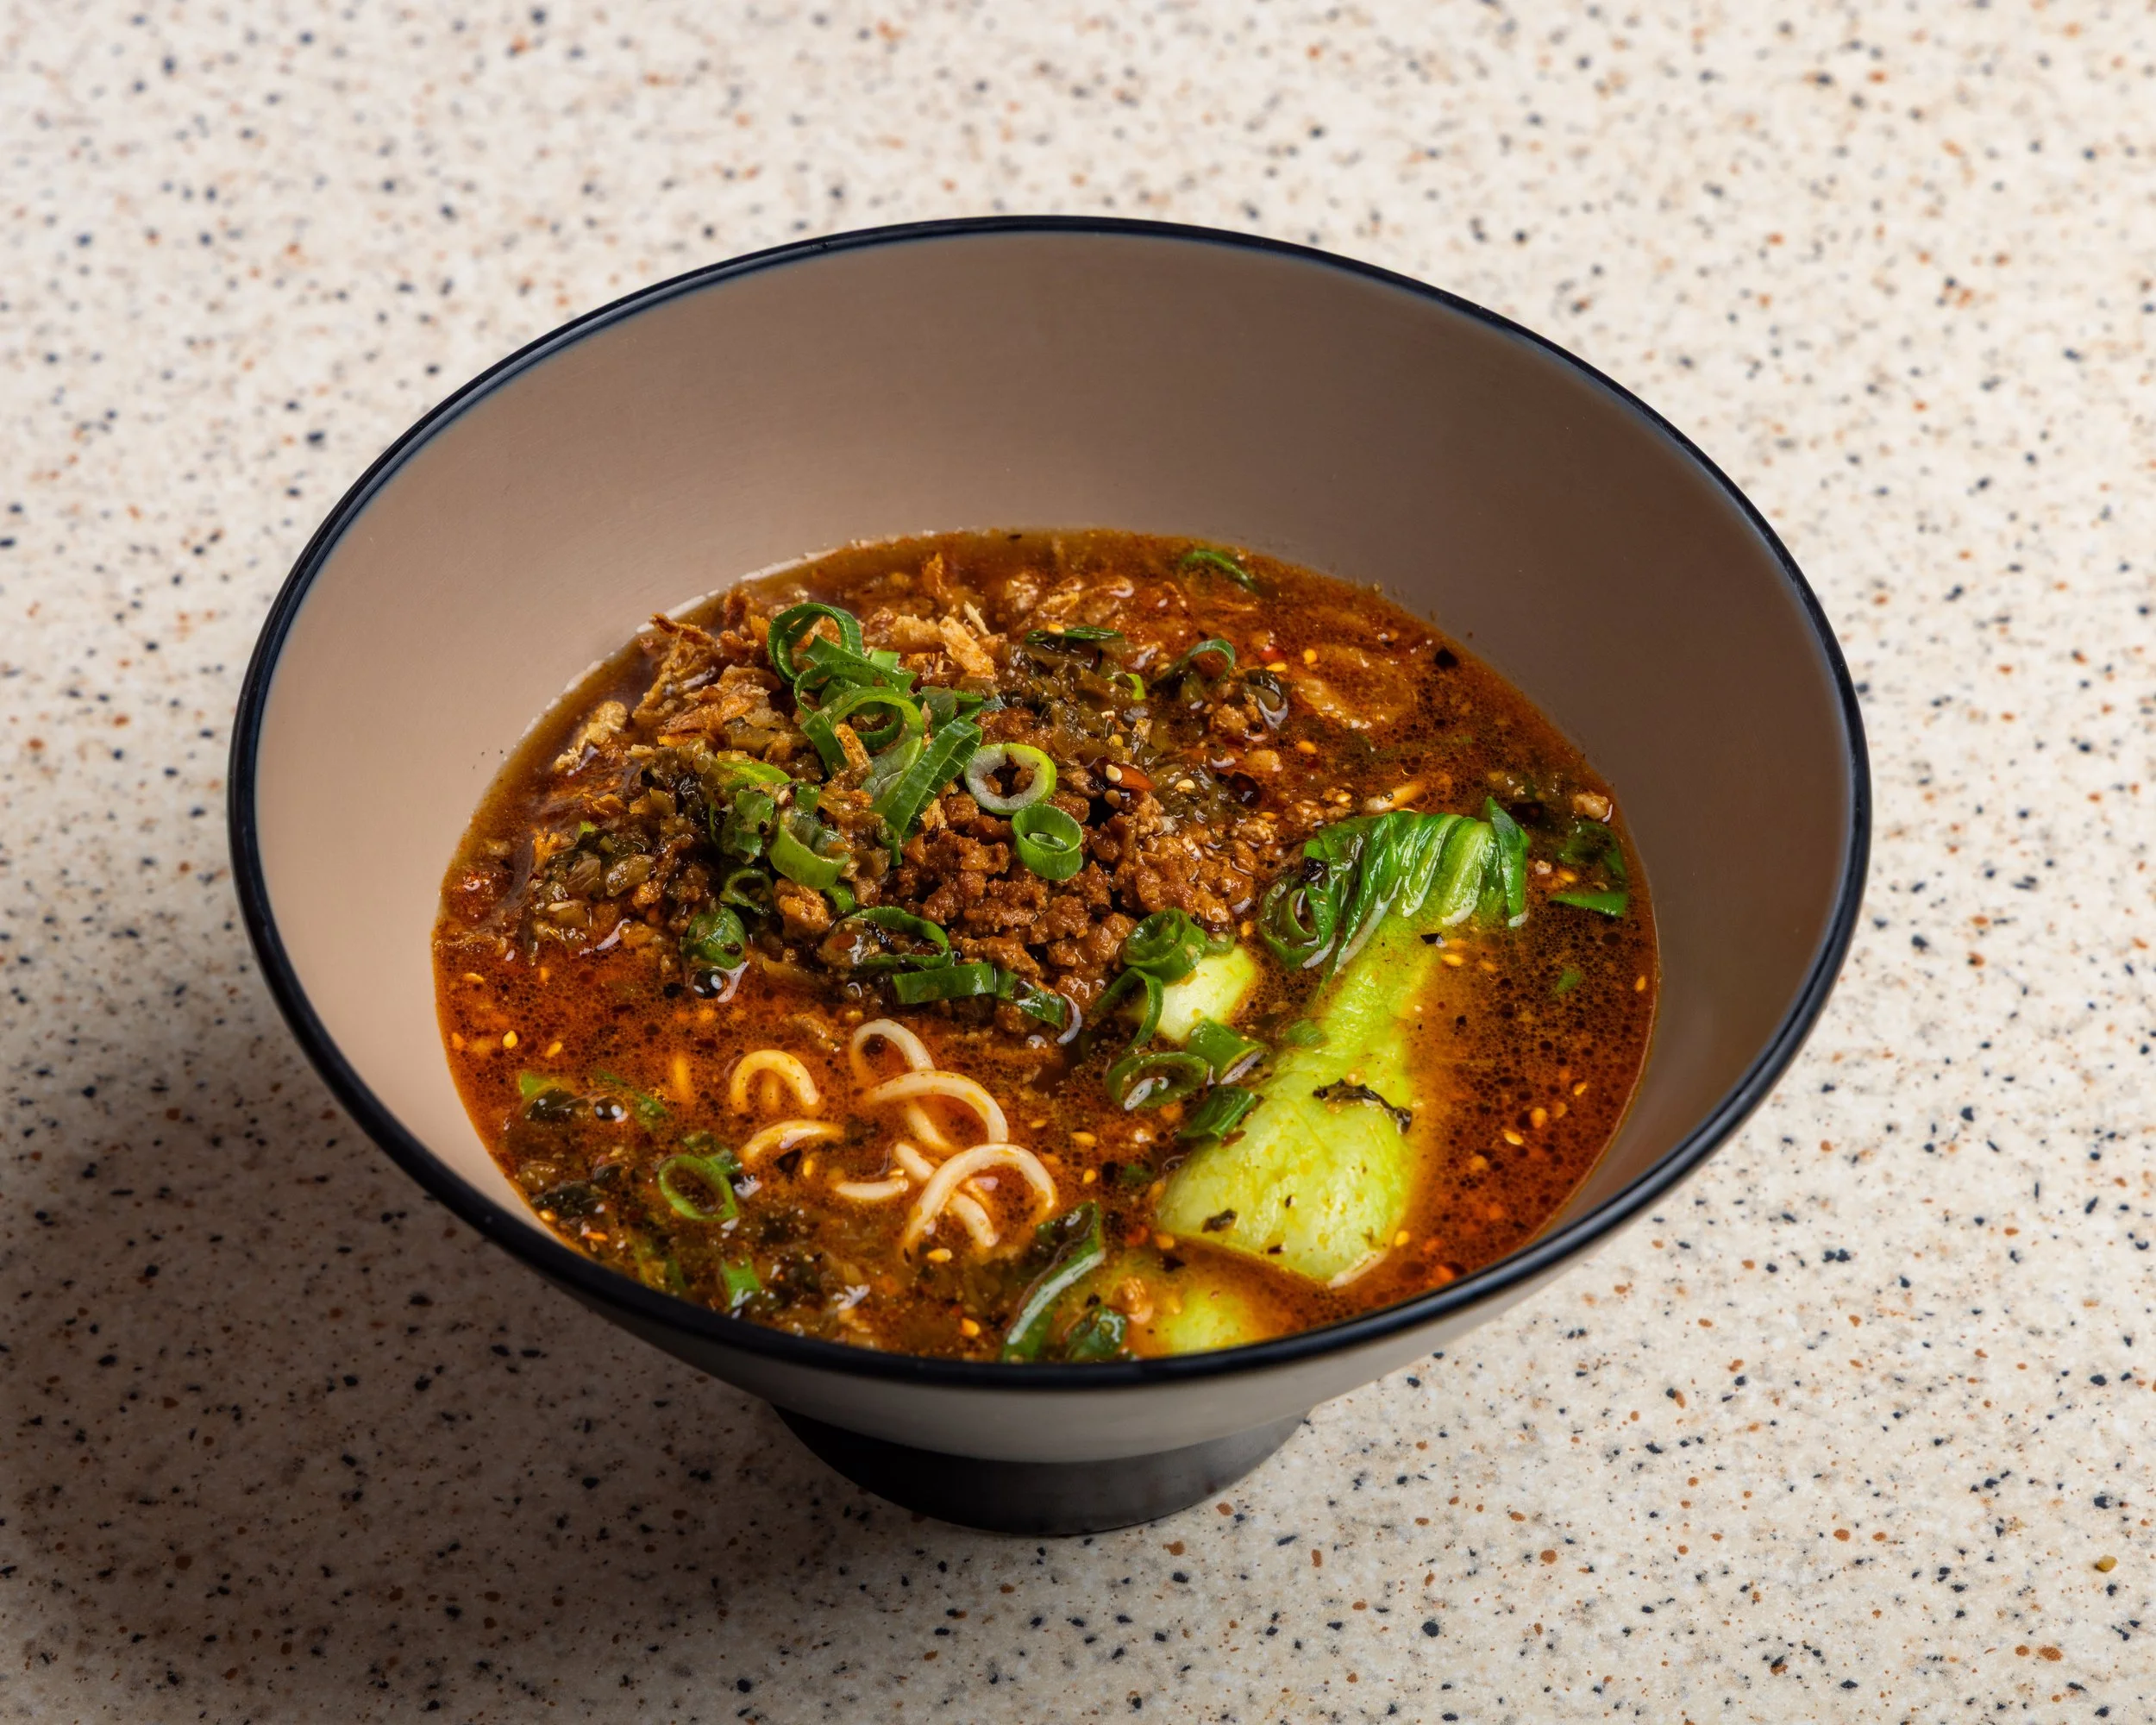
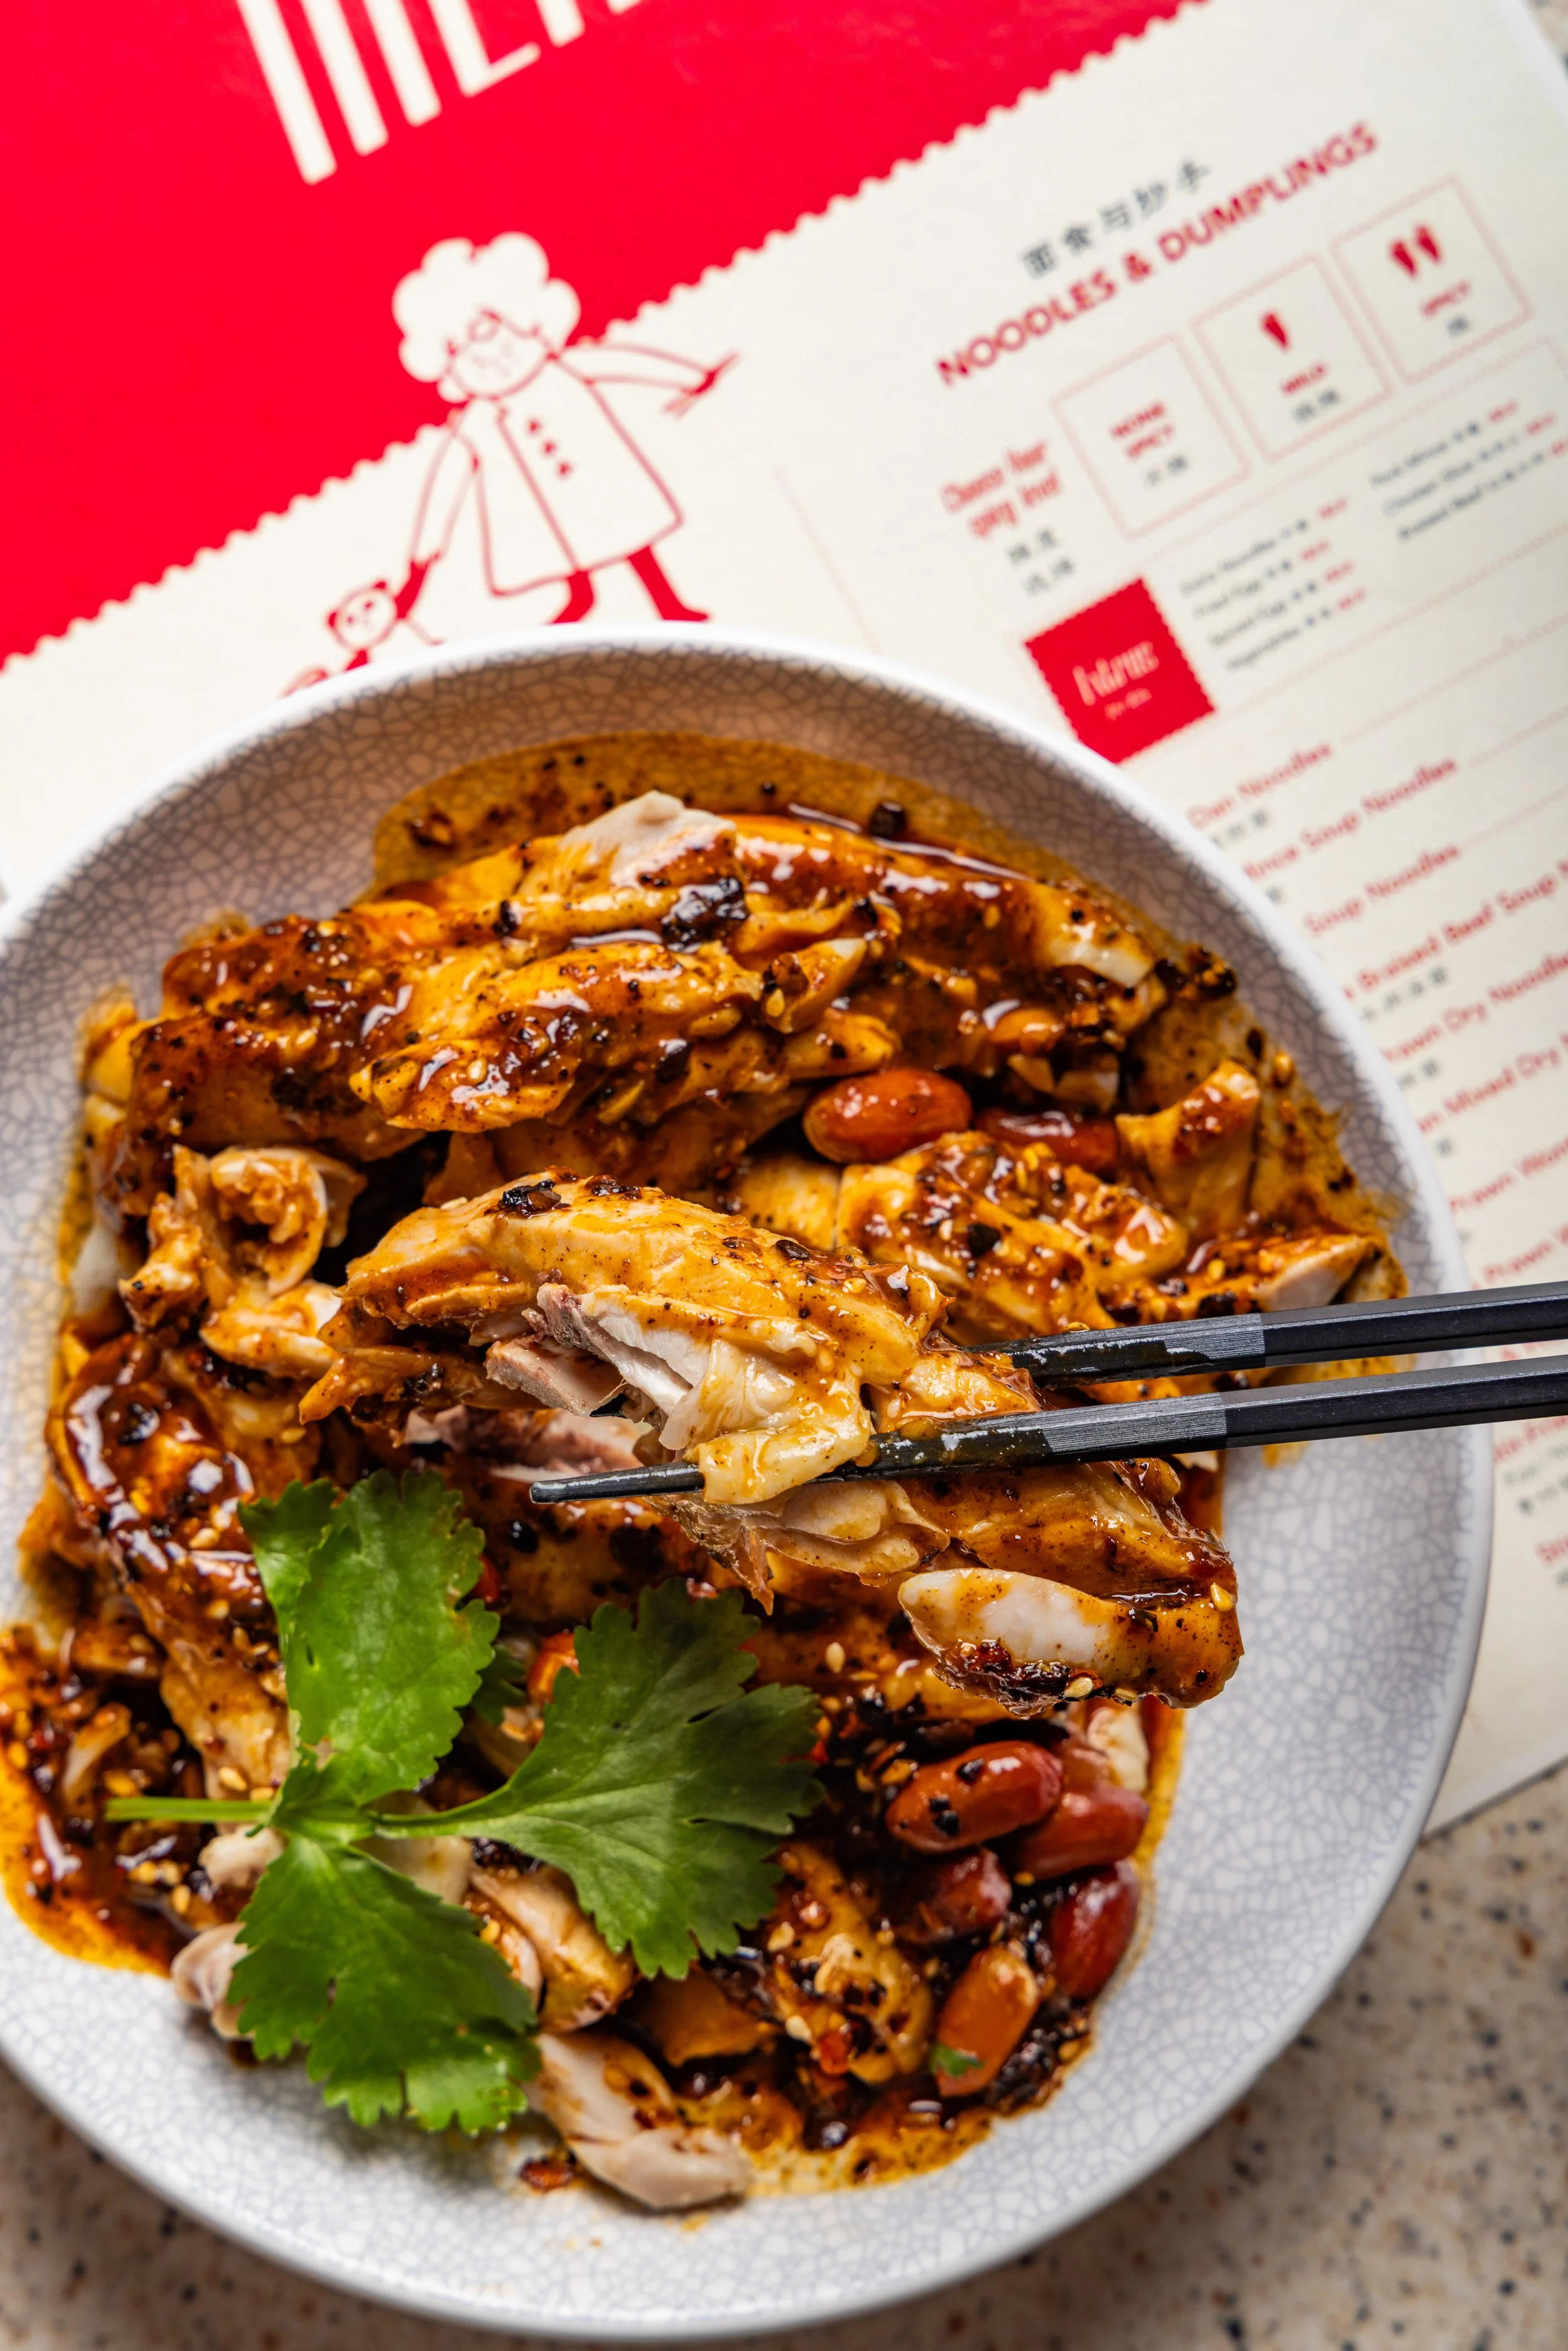
Our goal was to photograph a wide variety of Asian-inspired dishes from signature noodles and dumplings to vibrant stir-fries and rice dishes, making each item look as fresh and appealing as possible. The key to successful food photography is controlling the lighting to enhance texture and colour, ensuring every shot pops.
The Essential Gear Breakdown
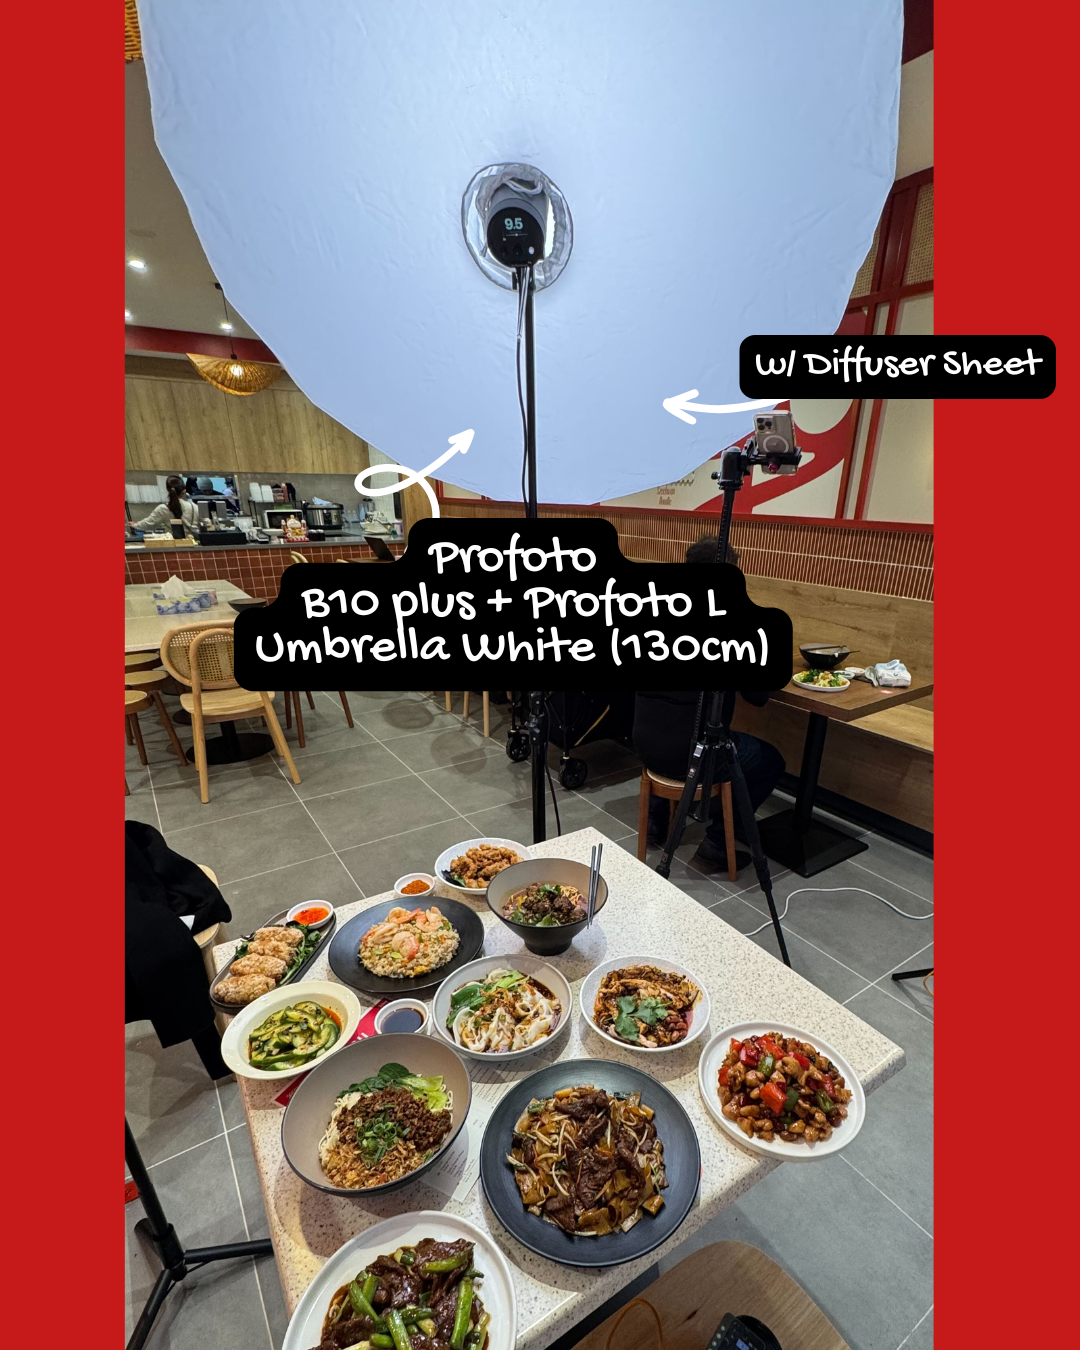
Here is the professional kit that made this shoot possible:
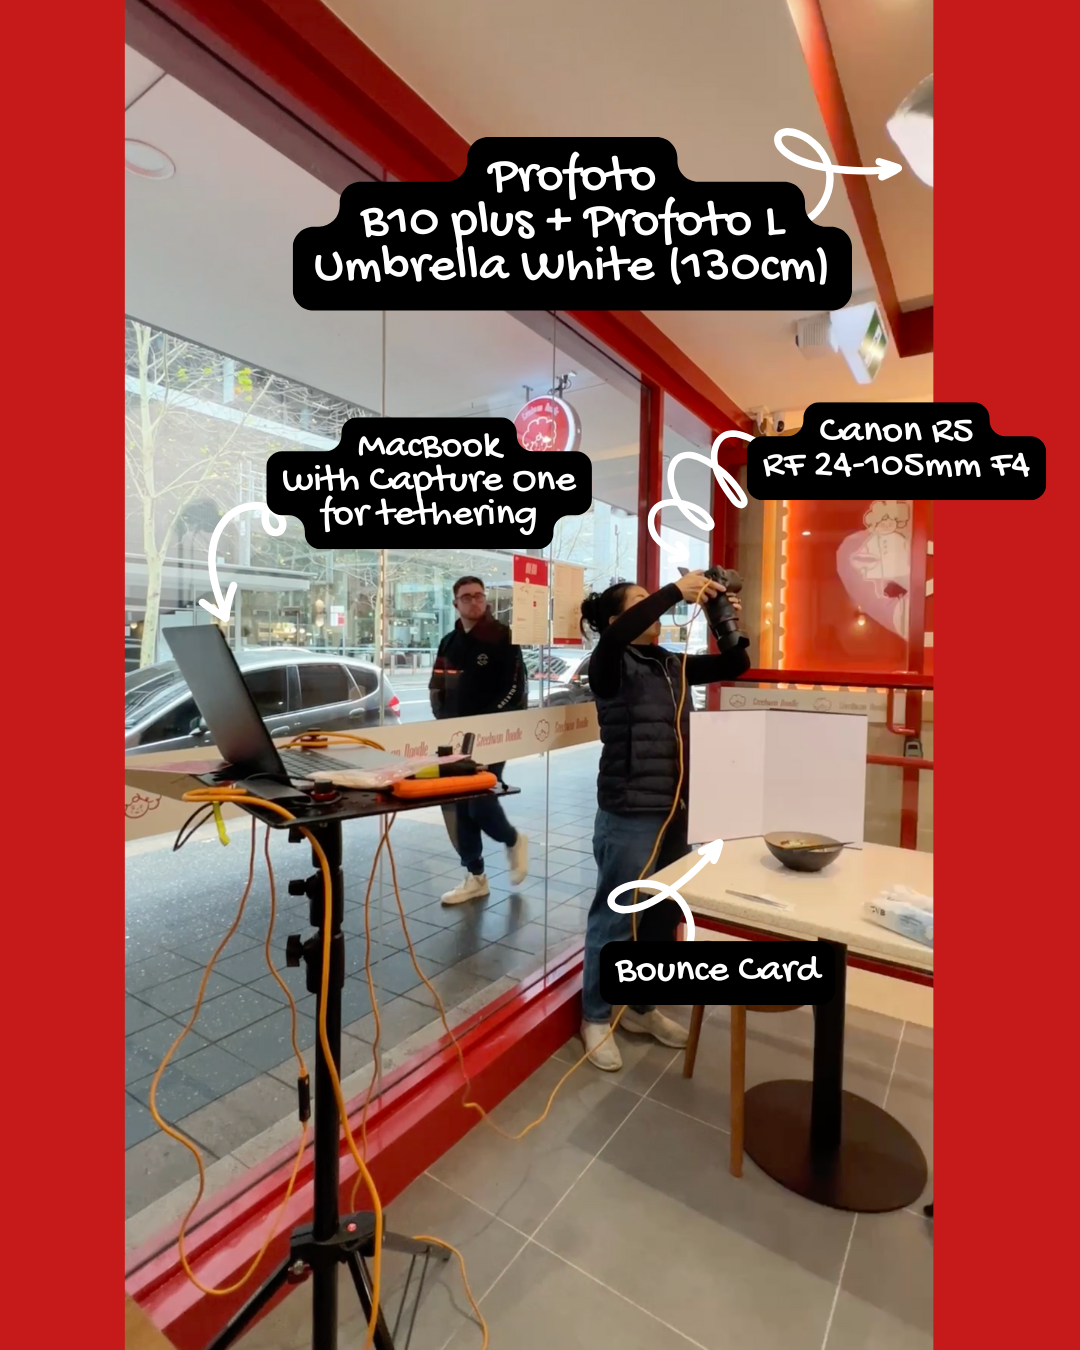
"Profoto B10 plus + Profoto L Umbrella White (130cm)"
"MacBook with capture one for tethering"
"Bounce Card"

"Profoto B10 plus + Profoto L Umbrella White (130cm)"
"w/ Diffuser Sheet"
"Capture one Software"
"tether tools cable"
"Canon R5 RF 24-105mm F4"
1. The Lighting Setup: Controlled, Soft Light
Main Light Source: Profoto B10 Plus
Why we love it: Powerful, compact, and provides consistent flash output, which is crucial for capturing detail and freezing motion (even if the motion is just steam!).
Light Modifier: Profoto L Umbrella White (130cm)
Why we love it: A large white umbrella creates a beautiful, soft, and expansive light source, mimicking natural daylight. This is the most crucial element for flattering food shots.
Diffusion: W/ Diffuser Sheet
Why we love it: The addition of a diffusion sheet turns the large umbrella into a massive softbox, making the light even softer and eliminating harsh shadows.
Fill Light/Reflector: Bounce Card
Why we love it: A simple white card used to reflect light back into the shadows of the food, adding subtle lift and ensuring no area is too dark.

2. The Camera and Lens
Camera Body: Canon R5
Why we love it: High resolution and excellent dynamic range are essential for capturing fine details and vibrant colors.
Lens: Canon RF 24-105mm F4
Why we love it: This versatile zoom lens allows for both wide overhead shots (the popular 'flat-lay' style) and close-up detail shots without having to swap lenses, which speeds up the workflow significantly.

3. The Workflow: Instant Review with Tethering
Tethering Software: Capture One
Why we love it: This software is the industry standard for tethered shooting, allowing for immediate, high-resolution review of images.
Tethering Hardware: MacBook and Tether Tools Cable
Why we love it: Shooting 'tethered' means the image immediately appears on the large laptop screen. This allows the photographer, art director, and client to review composition, focus, and lighting in real-time. This saves time and ensures everyone is happy with the results on the spot!
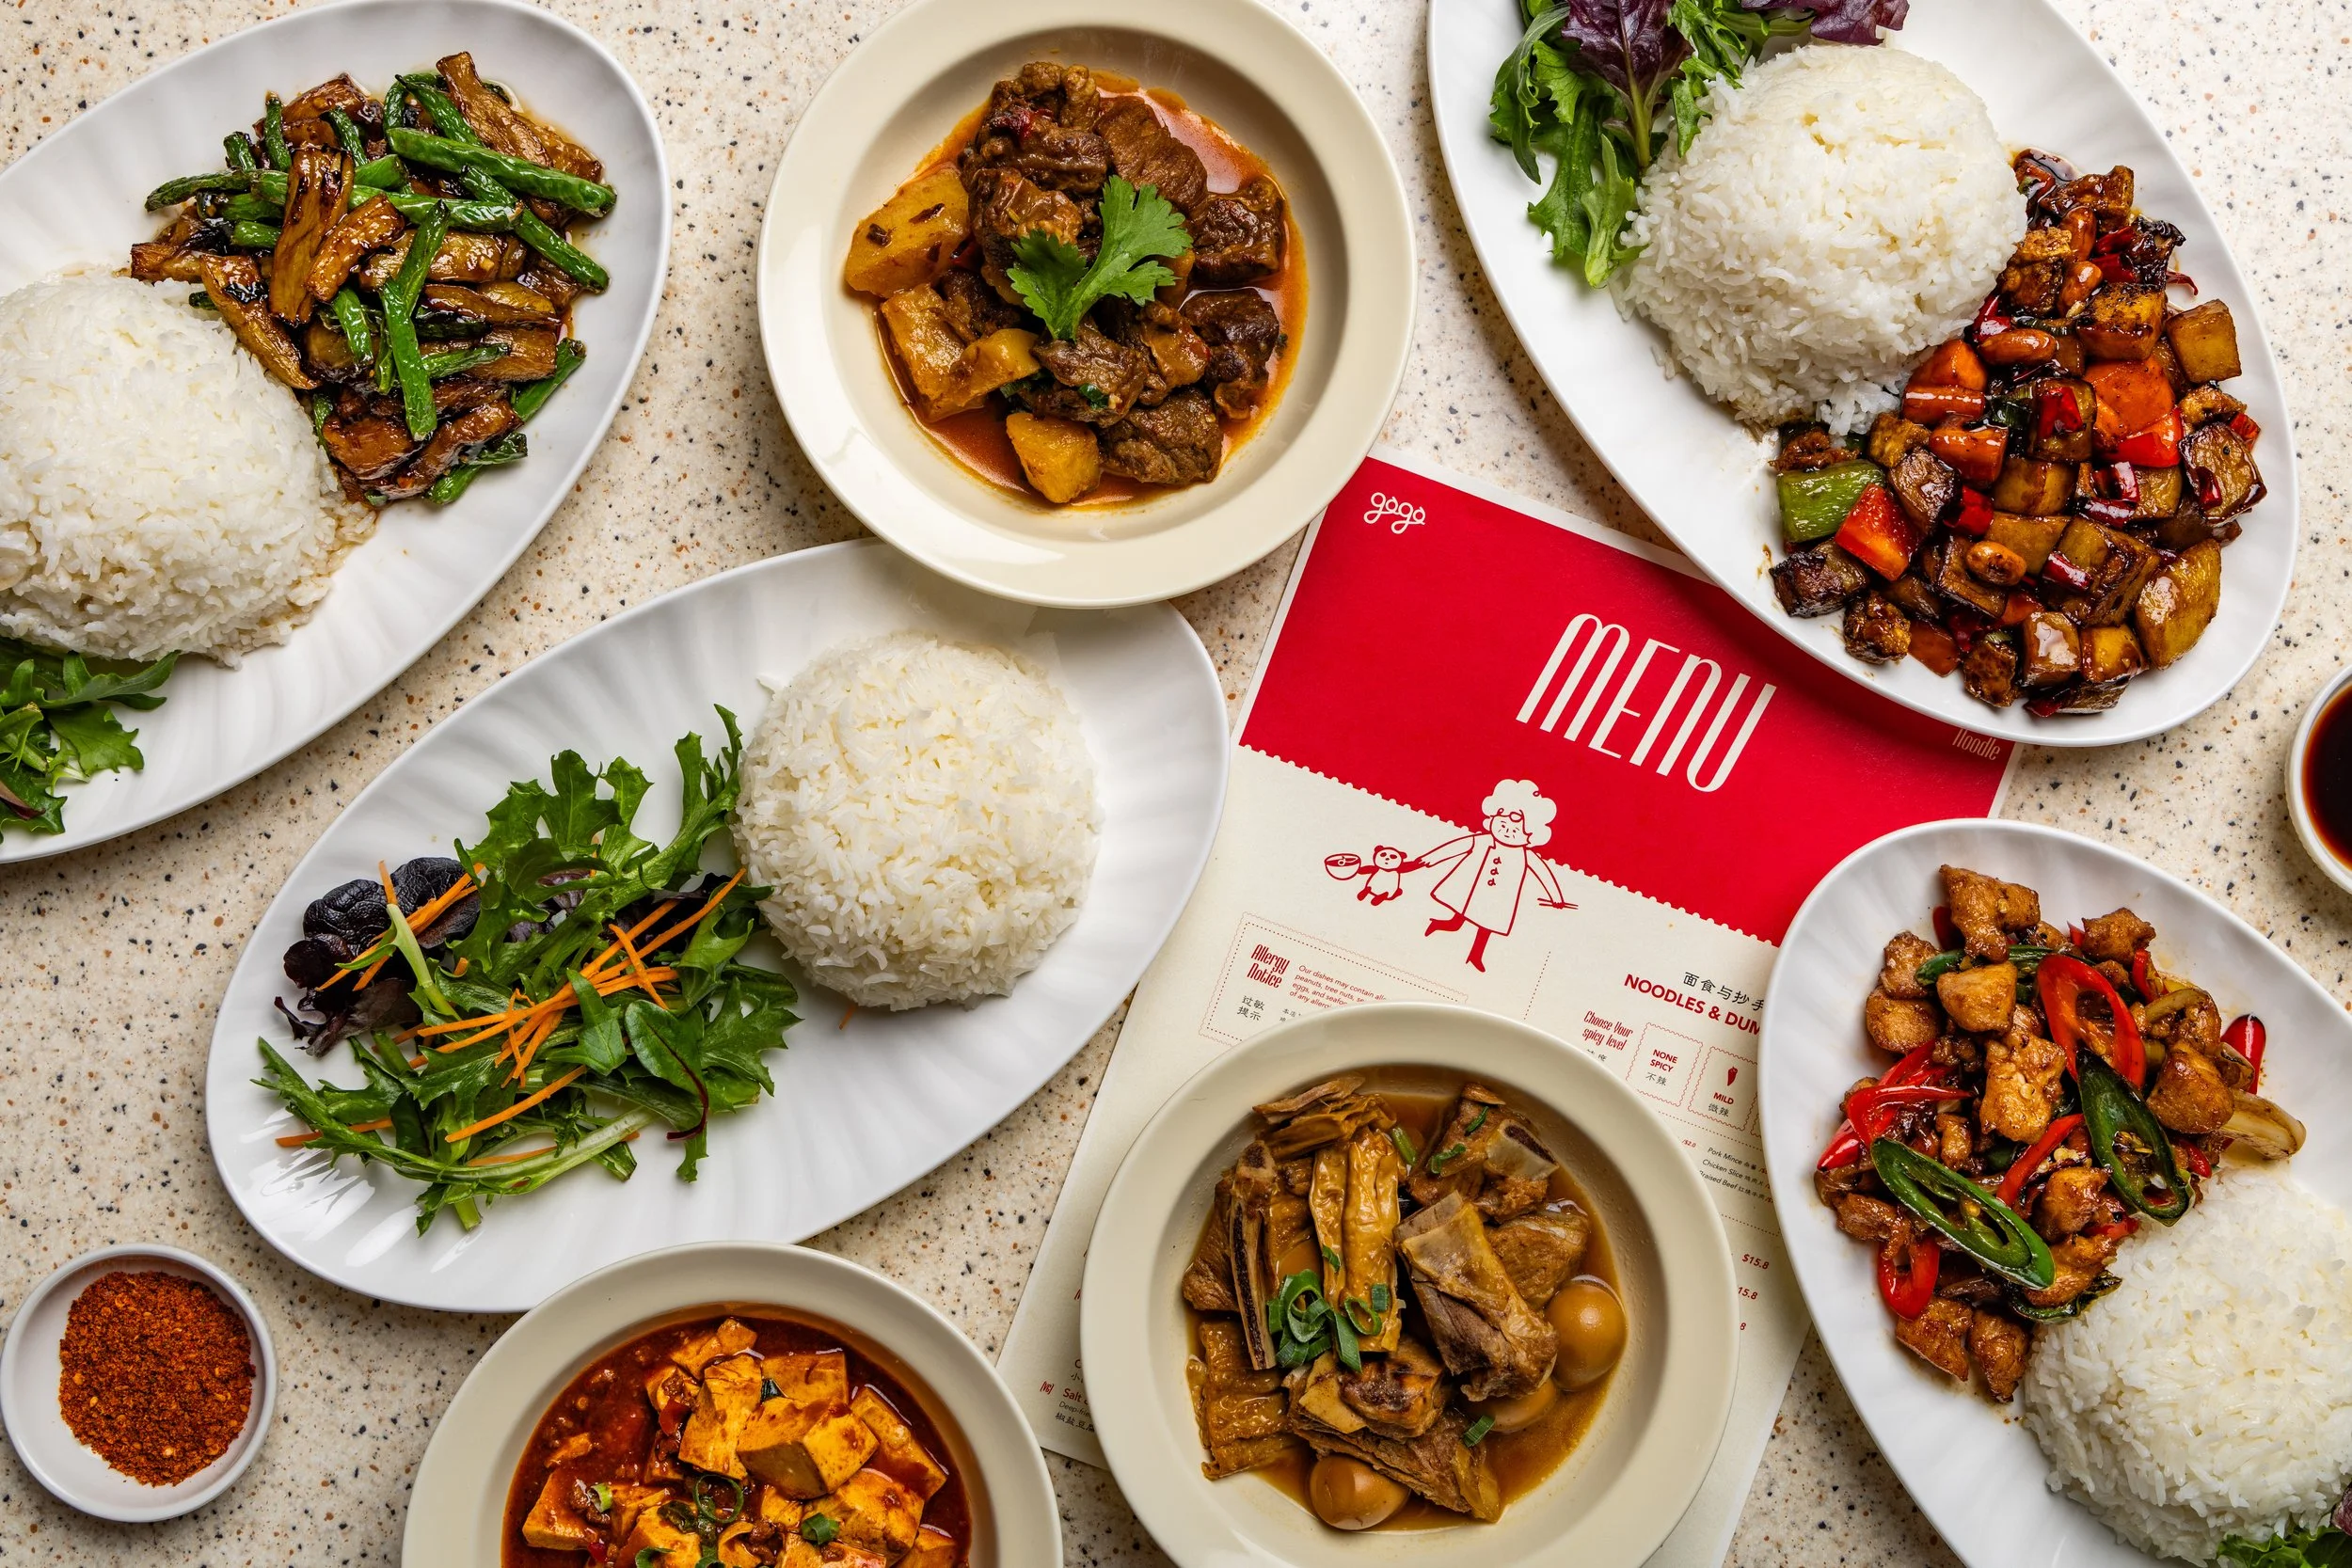
The Final Result
The combination of professional lighting and a seamless tethered workflow resulted in a stunning set of images—rich in color, sharp in detail, and ready for print and digital menus. The overhead flat-lay shots, in particular, showcase the entire spread beautifully, with every noodle, garnish, and sauce perfectly highlighted.
Looking to elevate your food photography? Investing in high-quality, controlled lighting and a tethering setup is the professional edge that will make your work stand out.
